Wednesday, November 21, 2018

7 Air Dry Clay Ideas


Air dry clay is commonly used with children and as such, can sometimes be overlooked as a potential material to make some wonderful things like plant pots, wind chimes and jewelry.  However, the idea of making stuff like the aforementioned may seem a little intimidating for those who know nothing about using air dry clay. So, today we’ve 7 Air Dry Clay ideas from all over the web for you to try out and start with!
But before that, you can purchase our Ultra Light Air Dry Clay or our Paper Clay (also air-dries) from our online store and our physical store.

Our Ultra Light Air Dry Clay…
1. Is incredibly easy to use and odourless.
2. Can be blended together to make new colours.
3. Dries with no cracks and has a bounce to it.
4. Retains a permanent shape after it hardens completely.
Our Air Dry Paper Clay…
1. Is easy to model, non-toxic and odourless
2. Dries with no cracks.
3. Can be moistened and remodeled before it hardens completely.
4. Once dry, can be painted and varnished.


1. DIY Young Buck Sculpture by make+haus
DIY Young Buck Sculpture
In a series of pictures, make+haus shows us how to make a really simple Young Buck Sculpture that you can hang anywhere around your house. No need for taxidermy over here!
Materials and tools needed:
~ White Ultra Light Air Dry Clay or White Paper Clay~ Clay Sculpting Tools
~ Twigs (make sure it’s dry and not damp)
~ Gold Paint
~ Paint Brush
~ White Spray Paint (use on paper clay if needed)

2. Colourful Clay Animal Heads by Delineate Your Dwelling
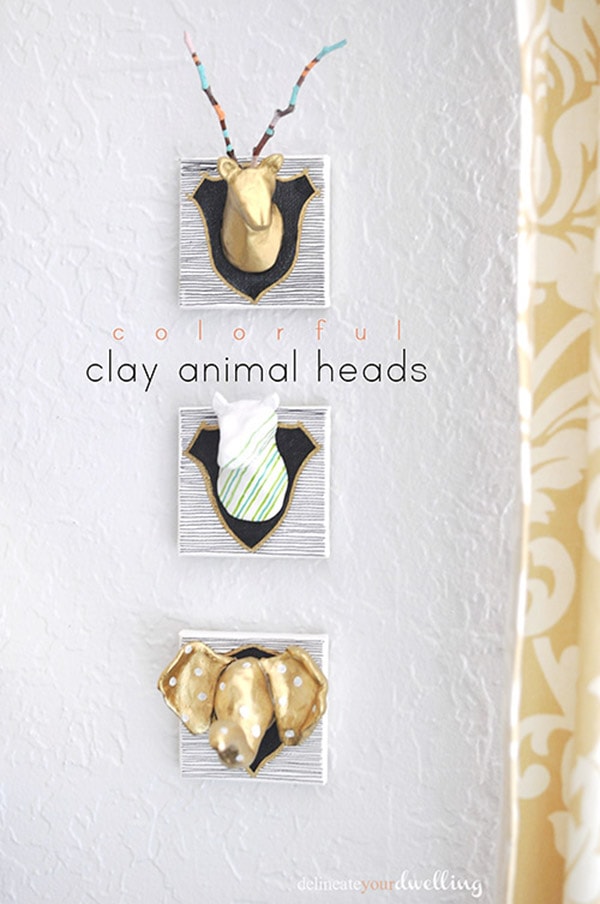
Fun and easy to make Clay Animal Heads! Delineate Your Dwelling
 Or, if the Young Buck Sculpture is too typical, you can check out this tutorial by Amy from Delineate Your Dwelling. In the tutorial, she shows you how to make a zebra head and an elephant head sculptures too!

Materials and tools needed:
~ Mini Square Canvas (optional)
~ Twigs (make sure it’s dry and not damp.)
~ Acrylic Paint
~ Paint Brush
~ Paint Pens
~ Hot Glue (optional)

*We’ve listed some of the materials and tools as optional because you can follow the previous tutorial where a hole is scooped out of the back for hanging.


3. Air Dry Clay Mini Pots by Journey into Creativity
 Have succulents around the house or little plants? (And if you don’t, maybe you’re planning to get some?) Here’s a tutorial where you can make your own hanging mini pots that’ll no doubt add a burst of colour to your home!

Materials and tools needed:~ Ultra Light Air Dry Clay (any colour) or White Paper Clay
~ Clay Sculpting Tools
~ Thick String
~ Paint (optional; we recommend using acrylic paint here)
~ Paint Brush (optional)
*We’ve marked the paint and paint brush as optional as they are only applicable if you use paper clay.
4. DIY Faceted Clay Tea Light Holders by Gathering Beauty
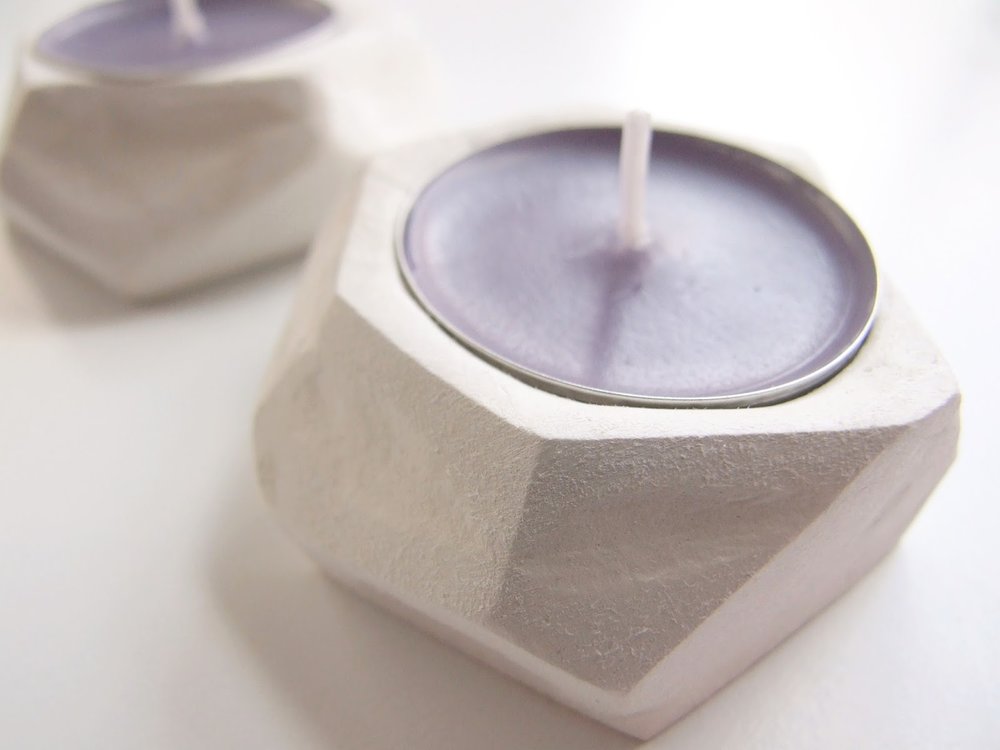
Diy Faceted Clay Tea Light Holders
Tea lights can be boring on their own. So, if you’ve been thinking of getting a tea light holder to make them more appealing, why not make your own faceted tea light holders by following Gathering Beauty‘s tutorial? It’s super easy and the holders will be more meaningful to you too!

Materials and tools needed:
~ Ultra Light Air Dry Clay or Paper Clay of any colour
~ Tealights
~ A knife
  

5. Geometric Clay Pendant Tutorial by Delia Creates
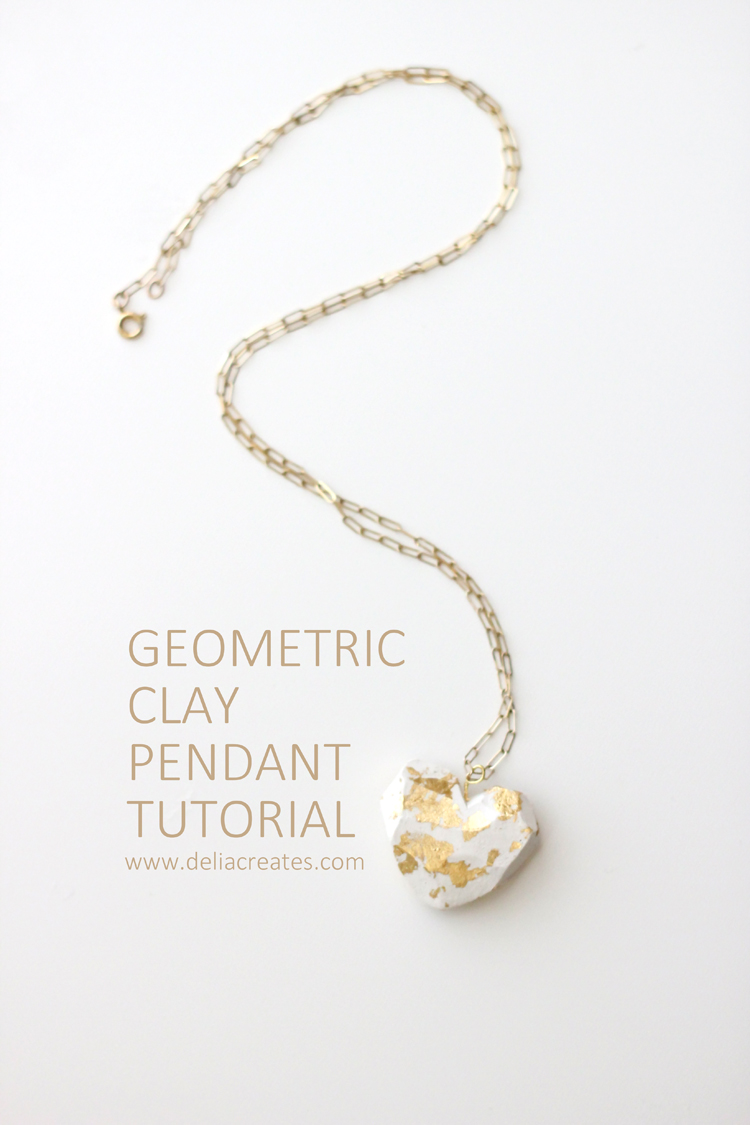
Clay Necklace (27 of 40)
Been wanting to get some geometric accessories but the ones you like are too pricey? Here’s a simple tutorial by Delia Creates which you can follow to make your very own geometric clay pendant! The tutorial can also be adjusted according to whatever shape you’d like to make, or for whichever type of accessory you’re aiming for.
*For this, we recommend using Paper Clay as our Ultra Light Air Dry Clay may not harden into the kind of texture similar to the one in the tutorial.
Materials and tools needed:
~ Paper Clay of any colour
~ A knife
~ Long sewing pin or straightened paper clip
~ Head Pin
~ Needle nose pliers
~ Gold leafing kit (optional)

6. DIY Torn Clay Bowls by Makery
DIY Torn clay bowls from air dry clay at www.makery.co.uk
Simple yet aesthetic, these torn clay bowls would look amazing on top of tables or vanities! To make your own, all you need to do is just follow this tutorial by Makery.
Materials and tools needed:
~ Ultra Light Air Dry Clay or Paper Clay of any colour
~ Bowls (to use as molds)
~ Rolling pin
~ Palette knife

7. DIY Clay Wind Charm by Design Sponge
 DIY Clay Wind Charm
Whether placed outside or inside your home, wind charms are always a great addition. By following this tutorial by Design Sponge, you’ll be able to make your own simple yet lovely clay wind charms. (They don’t have to be a plain white or shaped the way the one in this tutorial is, too! You can always customize the design according to your preferences.
Materials and tools needed:
~ Ultra Light Air Dry Clay or Paper Clay of any colour
~ Disposable plastic wine glasses with detachable base (or something similar)
~ Cotton cord
~ Rolling pin
~ A knife


There’s an ocean of many other tutorials on the internet, but the 7 we’ve listed here are some of the easier ones and they’re good places to start with if you’re someone looking to try out some air-dry clay crafts!

Pssst, we're also available at Craftiviti.com!

Wednesday, November 14, 2018

Four Butters You Can Add to Your Melt & Pour Soap


If you are a beginner, making melt & pour soaps is a good choice to start with since it’s safer, easier and less time consuming. It takes less than a day before a melt & pour soap bar can be used whereas most cold process soap bars require 4+ weeks to ‘cure’ (a.k.a. the saponification process during which fats, water and lye turn into soap). Moreover, there are many options when choosing a melt & pour soap base. You don’t have to come up with your own soap base recipe until you’re confident enough with your soap making skills!


Why Add Butter?
Butters like shea butter, cocoa butter, mango butter and kokum butter (all of which are available at our store) have moisturising and nourishing qualities. They make soaps more luxurious, though we recommend not adding more than a teaspoon of butter per pound of melt & pour soap. This is because too much butter will make the bases oily or soft, or cause them to crack or feel brittle/waxy.

Types of Butter and Some of Their Properties
Shea Butter
  1. Extracted from the seeds of the fruit of the Shea (Karite) tree
  2. May reduce inflammation and help avoid skin mutations
  3. Aids the skin’s natural collagen production
  4. Comes in either raw (ivory/gray in colour), natural (yellow), and bleached (white)
  5. Has a softer texture than cocoa and mango butter, but is slightly firmer than avocado and coffee butter
  6. Suitable for all skin types
*You can buy our ready-to-use, melt and pour shea butter soap base here.

Cocoa Butter
  1. Extracted from cocoa beans
  2. Antioxidants may help fight signs of aging
  3. Comes in natural or deodorized
  4. A type of hard butter
  5. Contributes firmness to soap
  6. Most suitable for dry and combination skin types
*You can buy our Pure Prime Pressed Virgin Cocoa Butter (Unrefined) here.

Mango Butter
  1. Comes from the seeds of the mango tree
  2. May help ease dry skin conditions and help slow down degeneration of skin cells
  3. Most mango butter on the market is refined and deodorized to remove scent and colour
  4. A type of medium/hard butter
  5. Contributes some firmness to soap, but not as much as cocoa butter
  6. Suitable for all skin types
*You can buy our 100% Mango Butter (Refined) here.

Kokum Butter
  1. Comes from the fruit kernels of Garcinia Indica.
  2. Extremely good for damaged skin since it’s super moisturising.
  3. Has a high stearic acid content of around 40-45%
  4. It is the most stable and hardest exotic butter.
  5. Contributes firmness and also helps thicken products
  6. Suitable for all skin types
*You can buy our Unrefined Kokum Butter here.

NOTE: All of these butters contain moisturising and nourishing properties.


Email us at enquiry@craftiviti.com if you have any enquiries or pop by the Craftiviti Craft Store at 10 Boulevard, Petaling Jaya, Malaysia.
If you found this post useful, please join us on Craftiviti Facebook or Instagram for more updates and demos!

References:
  1. “All About Butters In Bath & Beauty Products”, Soap Queen<https://www.soapqueen.com/bath-and-body-tutorials/tips-and-tricks/all-about-butters-in-bath-beauty-products/>.
  2. Gardenofwisdom.com
    <http://www.gardenofwisdom.com/butters.html>.
  3. “How To Use Kokum Butter”, Soap Queen<https://www.soapqueen.com/bath-and-body-tutorials/how-to-use-kokum-butter/>.
  4. “Shea Butter Vs Cocoa Butter Vs Mango Butter: Which Is Best And Why?”, DIY Natural<https://www.diynatural.com/shea-butter-vs-cocoa-butter-vs-mango-butter/>.
Pssst, we're also available at Craftiviti.com!

Wednesday, November 7, 2018

Make Shower Time Great Again


The thing about shower time is that it isn’t fun when all you do is simply clean. It’s functional but not fun-fun in the many ways bath time can be. Like, watching bath bombs dissolve, building bubble kingdoms or simply relaxing in warm waters with essential oils, clays and whatnot. Your only options for fun in the shower (short of bringing not exclusively shower-related activities like singing and attempting to skate on soapy floors without falling) would most likely be selecting your soap/shampoo for the moment, giving yourself bubbly hairdos and maybe a bubble beard or mustache or two, and just getting clean.
Fortunately, now that Shower Jellies have gotten viral, we now have the option of jiggling jiggly goodness while lathering ourselves up! And, to make things easier for all of us who want to DIY our own shower jellies, Stephenson Personal Care has come up with a super easy and convenient melt-and-pour Crystal Jelly Soap Base.
According to Stephenson Personal Care, this Crystal Jelly Soap Base…
  1. Is vegetable based
  2. Can integrate with other Crystal melt and pour bases
  3. Sets to form a jelly-solid product
  4. Has fantastic transparency which enables bright colours and also superior colour stability even if kept at a high temperature for extended periods
  5. Has good foaming
  6. Has excellent moisturising from a high glycerine content
  7. Has neutral odour
  8. Is ideal for pouring and moulding
  9. Can Be Sliced
Here’s their guide recipe on how to use their product:

Tips from the Craftiviti Team:
  1. We strongly advise to use a double boiler/bain maire instead of the microwave (as suggested by some online) because we’ve found that although microwaving reduces the time taken for the jelly soap base to melt, it increases the air bubbles in the base which cannot be removed and thus, compromises the stability of the soap.
  2. Using mica powder or soap dye is fine for this jelly soap base, but use as little as possible! Otherwise, the colours will bleed through.
  3. The jelly soap base hardens quickly so you’ll have to act fast! However, multiple reheats after it hardens is fine.
  4. Make sure to pour the required amount of jelly soap base into the mould in one go or it will harden in layers that can easily be separated.
  5. The jelly soap will eventually lose it’s shape, no matter how careful it’s handled. We recommend keeping it in containers similar to it’s shape if you’d like for it to retain the shape.

You can purchase Stephenson Personal Care’s Crystal Jelly Soap Base at our store here!

Pssst, we're also available at Craftiviti.com!

Wednesday, October 31, 2018

Three Differences between Essential Oils and Fragrance Oils


Distinguishing the differences between an essential oil and a fragrance oil may be confusing for beginners. So to make things a little easier, we’ve a post about three differences between these two different types of oils!
A row of essential oils we have in store!
  1. Sources and Reproducibility
Essential Oils are extracted from plants, which make them products of natural sources. To have a precise reproduction of a certain batch is impossible as plants have a ‘bouquet’ of components that are synthetically difficult to reproduce.(1) Moreover, the grades of essential oils vary according to seasons and growing conditions as well.
Fragrance oils, on the other hand, are synthetic. They do not possess the natural healing properties and therapeutic benefits you can get from essential oils. Though, unlike essential oils, fragrance oils last longer and there is a wider range for you to choose from since they can be easily made in a laboratory.

Fragrance Oils being sold at our store.
  1. Uses
Both oils can be used in the making of soaps, candles, cosmetics and such, but only essential oils are aromatherapeutic.
*According to Jane Buckle in Clinical Aromatherapy: Essential Oils in Healthcare, ‘aromatherapy’ is divided into three types: aesthetics aromatherapy, clinical aromatherapy and holistic aromatherapy. However, they are all essentially the practice of using oils extracted from plants to enhance psychological, spiritual and physical well-being of a person.(2)

  1. Price Difference
The price of essential oils varies depending on season, type, availability and the way it was extracted. In general, fragrance oils are cheaper than essential oils.


Email us if you have any enquiries at enquiry@craftiviti.com or pop by Craftiviti Craft Store at 10 Boulevard, Petaling Jaya, Malaysia.
If you found this post useful, please join us on our Facebook or Instagram for more updates and demos!

References:
  1. Christian Valnet, Essential Oils And Aromatherapy(Edizioni R.E.I, 2015).
  2. Jane Buckle, Clinical Aromatherapy: Essential Oils in Healthcare, 3rd edn (London: Churchill Livingstone, 2016).

Pssst, we're also available at Craftiviti.com!

Thursday, October 25, 2018

We Got Featured on the Vulcan Post!

A few months back, the founders of Craftiviti got featured on the Vulcan Post so we thought to share the news here!


To read the entire article, click here!


Pssst, we're also available at Craftiviti.com!

HOW TO MAKE SLIME

It's officially the school holidays and we were so excited to experiment (once again) making slime.

There are tons of tutorials out there and our first experience making slime wasn't all too successful. This time however, we made sure we watched as many videos as possible to determine which type of slime we were after.

Here's what you need:


  • Glue (you can use white craft glue, or even regular clear school glue)
  • Borax
  • Soap Dye / Food Coloring
  • Hot water
  • Mixing bowls
  • Measuring spoons
  • Gloves
  • Stirrer / Spatula
First, prepare your work station:

Wear your gloves as you won't want any colouring to stain your skin.
Then pour out the glue into the mixing bowl.


Add equal amount of hot water to the mixing bowl and mix thoroughly.


Measure out 2 teaspoons of borax and mix it into a cup of hot water (we used 40 ml).


Add dye into the borax mixture.

Pour the borax and dye mixture into the glue mixture and stir.


Stir until glue mixture turns into a blob of slime.


Remove from mixing bowl and knead lightly.


There you have it, your own handmade slime!

To make it more slimey, leave the slime in a bowl of hot water for about 15 minutes for it to absorb more water.

JOIN US ON FACEBOOK