Showing posts with label how to. Show all posts

Thursday, November 7, 2019

Our Top 3 Uses for Lemon Essential Oil


If you think about a smell that’s commonly associated with cleanliness and pleasantness,  the first one that pops into your mind would most probably be lemon or other citrus scents. Just smelling citrus can be refreshing, but that’s not all to it.
For today’s post, we’ll be focusing on Lemon Essential Oil, whose scent can perk you up. It’s purported to have powerful anti-microbial activity, and it can disinfect surfaces. Some also swear that it can help improve the condition of your skin, reduce excess sebum production, and eliminate dandruff! With so many uses for this amazing essential oil, it can be a little overwhelming for those who don’t know where or how to start using it. So, here’s our Top 3 uses for it!
craftiviti lemon essential oil yein and young
1. Air Freshener
Don’t have good ventilation at home? Dislike the smell of cooking/food permeating your space after you’re done eating, or simply want to freshen up spaces that feel stuffy/has stale air? You can add up to 20 drops of lemon essential oil to 18ml of water in a 20ml Amber Spray Bottle and give it a good shake before spraying the area.
Pssst! All citrus-type essential oils are photosensitive. It’s best to keep them in amber glass bottles to protect them from UV light, and also because they break down plastic bottles.
If you’re not a fan of multiple shakes before using this spray, you can add in Polysorbate-20 (an emulsifier which is used to bring small amounts of oils into a watery environment). The amount of Polysorbate-20 that you’ll need to add is equivalent to the amount of lemon essential oil added. So…
With Polysorbate-20
20 drops of Lemon Essential Oil + 20 drops of Polysorbate-20 + 18ml of Water
Without Polysorbate-20
20 drops of Lemon Essential Oil + 18ml of Water
51
2. Facial Oil
Anti-inflammatory, antioxidant, detoxicant, and balancing is just a few of the properties and benefits lemon essential oil has for the skin. By adding 12 drops of lemon essential oil to 30ml of jojoba oil + sweet almond oil, you’ll get a moisturizing, skin balancing, detoxing and relieving, anti-inflammatory and antioxidant facial oil. All you need is a amber bottle with a dropper cap to store this facial oil.
Pssst! This works as a body and hair oil too! When applying to your hair, use it as a hair oil mask. Leave it in your hair for a minimum of 15 minutes before shampooing and rinsing.
12 drops of Lemon Essential Oil + 15ml of Jojoba Oil + 15ml of Sweet Almond Oil
*Note: If this oil is too ‘heavy’ for you, you can reduce the amount of jojoba oil and increase the amount of sweet almond oil instead.
Fresh lemon with lemon essential oil on white background.
3. Insect Repellent
Thanks to the tropical weather we experience in Malaysia, there’s an abundance of bugs and lizards everywhere and not many of us are fans of them. Add 10 drops of lemon essential oil, 15 drops of tea tree essential oil or eucalyptus essential oil and a pinch of menthol crystals to some refined coconut oil in a wall burner. Allow the scent to envelop your room and you’ll have a pretty efficient insect repellent that also has other aromatherapeutic benefits like clearing blocked noses and boosting your mood!
10 drops of Lemon Essential Oil + 15 drops of Tea Tree / Eucalyptus Essential Oil
+ a pinch of Menthol Crystals + Refined Coconut Oil
happy craftingbuy it

Wednesday, September 25, 2019

DIY Soothing and Moisturizing Lavender Lotion


One of the most popular essential oils in aromatherapy, Lavender Essential Oil is known  for it’s ability to promote relaxation. In addition to it’s anti-fungal, anti-inflammatory, antidepressant, antiseptic, antimicrobial and antibacterial properties, it’s also said to be detoxifying, and has the ability to relieve spasm of involuntary muscle and pain.
So yes, it’s a definite that we’d incorporate it into our DIY lotion!
bty
What you’ll need:
  1. Craftiviti’s CP Lotion Maker
  2. Distilled Water
  3. Lavender Essential Oil
  4. Jojoba Oil
  5. (Optional) Preservative 👉 We used Liquid Germall Plus here, but you can opt for Ecocert Preservative – Tea Tree Oil Extract!
  6. Container 👉 We used this Amber Glass Jar (50g)
  7. Stirrer
  8. Beaker
  9. Measuring Spoon
Instructions (for approx 50g of lotion)
  1. In a beaker, measure 50ml of distilled water.
  2. Add in 2ml of Craftiviti’s CP Lotion Maker.bty
  3. Stir until they blend and the texture thickens into a creamy consistency.bty
  4. Add in 5ml of Jojoba Oil and up to 5 drops of Lavender Essential Oil. Stir until blended evenly.
  5. (Optional) Add in one drop of Liquid Germall Plus or Ecocert Preservative – Tea Tree Oil Extract. This will extend the shelf life of the lotion to 6 days. Without it, the lotion will only last for 3 days in the fridge.bty
  6. Scoop the lotion into your choice of container. It’s now ready to be used!
bty
happy crafting

Saturday, August 17, 2019

Super Cute Animal Aroma Stones DIY


If wax sachets or double boiling aren’t your thing but you’d still like something flame-, electricity-, or battery- free to release scents into your space, aroma stones are your next best bet 😍
IMG_20190725_122036
What you’ll need:
  1. Silicone Mold 👉 We used this super cute animal with heart mold!
  2. Plaster of Paris
  3. Essential Oils 👉  We have a variety here that you can choose from!
  4. Stirrer
  5. Beaker
  6. Bowl

Instructions

  1. Mix two parts of Plaster of Paris with one part of water. Make sure to pour the powder into the water and not the other way around because the powder is light and will definitely fly up!
    IMG_20190725_122941
  2. Once the mixture is smooth, pour it into your silicone mold.
  3. Set it aside to harden for a few hours. It will be best to leave it for a day just to be sure!
  4. Carefully pop out the aroma stones. You can drip as much essential oil (or fragrance oil) on it as you’d like, and as often as you prefer to too.
    IMG_20190728_145027

Notes:

  • Be gentle when handling your aroma stone. Plaster of Paris is sturdy, but when dropped at a certain height, it will break!
  • Some essential oils and fragrance oils are dark in color, which may affect the color of the aroma stone.
  • You can color your aroma stone using acrylic paint. After mixing the Plaster of Paris powder with water, add in some acrylic paint (4 drops for each 100g) and mix until the color spreads evenly. Be careful not to add too much or it will compromise the stability and hardening ability of the Plaster of Paris!
happy crafting
Pssst, we're also available at Craftiviti.com!

Monday, July 22, 2019

9 Common Candle Making Mistakes and How to Avoid or Fix Them


A cheaper alternative to buying candles would be making them, and while it’s a fun craft where you’ll have complete control of how your candle looks and what would go in it, there are also risks and problems you can stumble into.
At Craftiviti, we often hear from our customers about the issues they face while making their own candles at home, and have come to notice that there are 9 common ones. So, for today’s blog post, we’ll be sharing with everyone our knowledge on these common candle making mistakes, why they happen and how they can be resolved ✨

1. When burnt, the candle emits smoke.
Among the possible causes for this would be:
a) a high fragrance/essential oil content
b) over-wicking a.k.a. the wick is too large for the candle
c) air pockets in the candle
How to avoid/fix them:
a) decreasing the amount of fragrance/essential oil content. For our waxes, we generally recommend adding no more than 10-12% of the total weigh of wax used per candle.
b) within a series of wicks, the larger the number the larger the wick. However, it should be noted that different waxes, fragrance/essential oils and even the colorants used can affect the burning of the candle.
c) you can warm up the container (for glasses and ceramics).
~ * ~
2. Cracks, holes and/or air pockets in the candle.
This is caused by the presence of water in your mould/container. Even the tiniest amount of moisture can cause a crack or hole to appear in your candle so it’s best to ensure that your mould/container is entirely dry before you pour in the wax.
Another possible cause is the temperature of the wax when you pour it into your mould/container. A lower than recommended temperature when pouring can cause air pockets in your candle. Thus, to avoid air pockets from forming, you can either warm up your container (for glass or ceramic ones only), or reheat your wax.
~ * ~
3. Candle doesn’t burn evenly.
This happens when the wax you use has a too-high melting point (or it’s just too hard) and/or the wick used is too small. You can easily solve this by blending or changing waxes, or using a bigger wick/multiple small wicks.
~ * ~
4. Colour change
Your candle having changed colours is a common occurrence. As wax cures over time, the colour of a candle can eventually darken over time. Or, if the colour changes as soon as the wax has cooled, then it’s probably because the wax was too hot when your poured it.
*Note: Always store your candles away from direct sunlight while they’re curing because they can affect the colour as well!
If you’ve multiple coloured waxes in a container, there’s a chance of the colours bleeding into each other as well. To avoid this, always allow the wax to harden entirely before pouring in more. Though, remember to pour the next layer at the correct temperature! Too hot and your previous layer might melt and cause the colors to bleed. Too cold and you might risk the presence of air pockets, cracks or holes!
~ * ~
5. I can’t smell anything from my soy candle when it burns.
Generally, soy wax has a good cold scent throw (a.k.a. it smells amazing when the wax isn’t hot) but very little hot throw. (a.k.a. you can’t smell anything when it’s hot/melting).  If you’d like for it to release a strong aroma when it burns, you can use a blend of waxes like beeswax and soy wax, or palm wax and soy wax.
~ * ~
6. The candle wick drowns out.
Usually happens when:
a) your wick is too small for your candle diameter
b) you’ve poured your candle above the point where your container changes shape (ie: the neck of the container)
c) you’ve cut your wick too close to the wax.
This can be fixed by:
a) switching to a larger wick
b) ensuring that the candle doesn’t reach the point where the container changes shape
c) by leaving at least 1cm of space between the tip of the wick and the wax.
~ * ~
7. I can’t demold my pillar candle!
A likely reason as to why this happens is that your wax is too hot when you’ve poured it into the mold. The best way to ensure that this doesn’t happen again is to wait a little after melting the wax before pouring it.
Though, if you’re stuck in this situation right now, try placing your the stuck candle in the refrigerator for a few moments. Once it’s cold enough, you can slide the candle out more easily.
~ * ~
8. The colorant is sitting at the bottom of the candle.
This happens especially when you’re using powder colourants like mica powders or cosmetic pigments. A way to decrease the occurrence of this is to give your melted wax a stir before every pour, or you can make a paste with your powder pigments with a tiny bit of carrier oil before mixing in with your wax.
~ * ~
9. My candle is too soft!
A likely reason as to why this happens is the presence of too much oil. Reduce the amount of fragrance/essential oil used and it should be fine.

We hope this post helps! ❤
happy crafting
Pssst, we're also available at Craftiviti.com!

Tuesday, July 16, 2019

Quick, Easy and Effective DIY Cuticle Oil using only 2 Ingredients!


Used on the cuticle, skin and nail area, cuticle oil moisturizes, protects against damage and trauma, and also improves the health and appearance of these areas. It’s a lifesaver for everyone, whether you’ve long nails or short nails.
So, for today, we’ve a quick, easy and effective DIY Cuticle Oil using only two ingredients and one optional ingredient 👇
IMG_20190716_164611
What you’ll need:
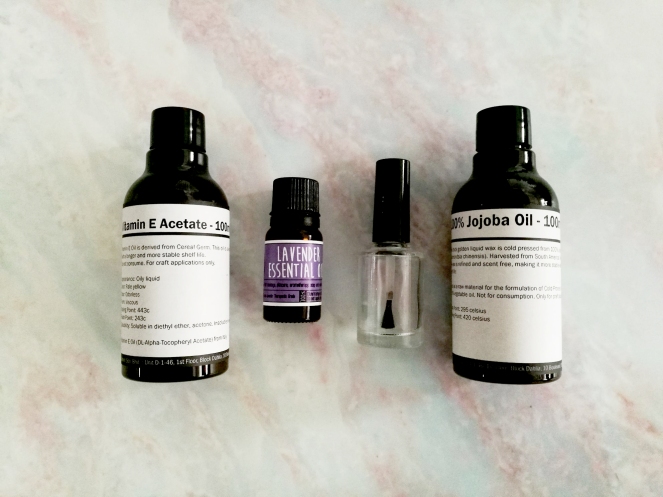
  1. Jojoba Oil (Why use this? Because it’s the closest to the sebum our skin produces!)
  2. Vitamin E Acetate (This type of vitamin only benefits the skin, it does not help to prolong the shelf life of the cuticle oil)
  3. Empty Cuticle Oil Brush Pen or Nail Polish Bottle
  4. Essential Oil (Optional; We recommend using Lavender/Tea Tree EO for keeping your nails healthy and strong, or Peppermint/Sweet Orange EO for nail growth!)
Instructions (for 15ml of cuticle oil)
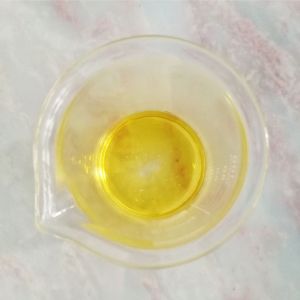
  1. Measure out 10ml of jojoba oil and 5ml of Vitamin E Acetate.
    *Note: If the consistency is too watery for you, you can add more Vitamin E Acetate.
    IMG_20190716_164627
  2. (Optional) Add up to 5 drops of essential oil.
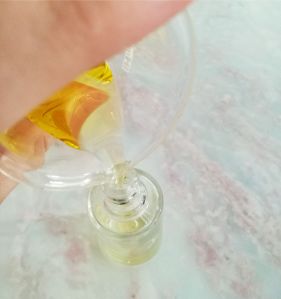
  3. Mix thoroughly before pouring into your container of choice.
    IMG_20190716_164710
  4. It’s now ready to use!
    *Note: You can reapply cuticle oil as often as you’d like, but do wait for it to be completely absorbed into your skin before doing so!
happy crafting
Pssst, we're also available at Craftiviti.com!

Tuesday, July 9, 2019

DIY Aromatherapeutic Wax Sachet


Wax sachets (also known as wax tablets) are another wick-less cousin of candles, but unlike wax melts which are meant to be melted, wax sachets are meant to be left around a space, near the sun to allow it to be naturally warmed in order to release aroma.
Like wax melts, they’re safer than candles because you don’t need to light them up. Unlike wax melts, there’s no need for electricity (if you’ve an electrical wax burner/warmer) or a lighted flame (if you have a traditional one) as well to unleash the aroma from wax sachets. All you need is good ol’ sunlight!
bty
What you’ll need:
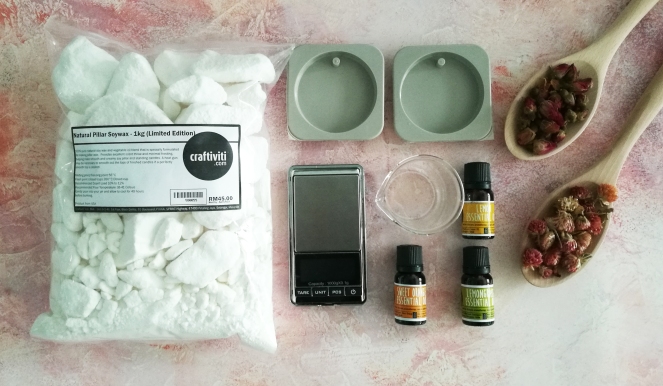
  1. Natural Pillar Soywax
  2. Dried Rose Buds
  3. Dried Amaranth Globe Flowers
  4. Essential Oils 👉 we used lemongrass, sweet orange and lemonessential oils here.
  5. Wax Sachet Silicone Molds 👉 we used these 30g molds.

Instructions

  1. Melt 25g of Natural Pillar Soywax in a double boiler.
    *Note: If you’re making plain wax sachets, you can use an amount of wax equal to the maximum of the silicone mold. We’re using less here because of buoyant force of the decorative dried flowers.
  2. Turn off heat once entirely melted and add in up to 2.5g (or 10% of total wax used) of essential oils. Stir so the essential oils are evenly dispersed.
  3. Pour into wax sachet mold.
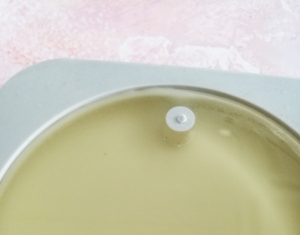
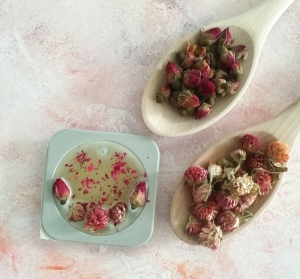
  4. Wait until a white ring forms at the edges of the mold (as pictured below) before placing dried flowers as decoration. This is your wax hardening, so don’t wait too long or else you wont be able to decorate your wax sachet nicely!
    bty
    bty
  5. Once fully hardened, you can remove your wax sachet from the mold. Make sure to be firm but gentle, or else it might break!
bty
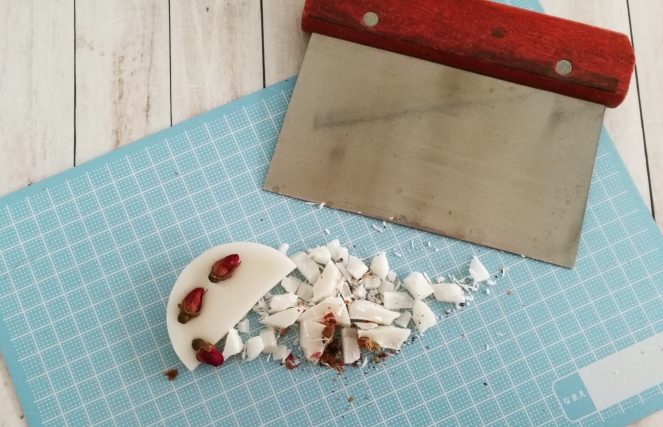
Pssst! If you accidentally broke your wax tablet like we did, no worries! You can turn it into a wax melt bits by chopping it up 👇
bty

happy crafting
Pssst, we're also available at Craftiviti.com!

JOIN US ON FACEBOOK