Showing posts with label information. Show all posts

Monday, October 14, 2019

How Plant Powders Are Made


In forms like extracts, oils and powders, plants have always been incorporated in skincare. For instance, rose is popular for being antibacterial, anti-inflammatory, and having antioxidants—usually infused in products meant to fight acne, reduce redness, boost moisture in skin. Orange is added for it’s richness in vitamin C which helps to even out your skin tone, and aloe vera is a known healing plant.
There’s also ginger root which can help stimulate blood circulation, and pine bark extract with it’s ability to increase hydration and elasticity of skin. So, it’s clear that when used in the right way, plants can do wonders for our skin!
Natural oraganic homemade soap making
For today’s blog post, we’ll be talking about how plant powders—one of the forms in which plants are incorporated into skincare—are made. Like how there is a variety of plant powders, there’s also a few ways to produce them.
~ * ~
moringa_powder1. Grinding into Fine Powder
Powders like green tea powder, mint powder and moringa leaf powder are made using the leaves of their plant which has been dried and then, ground into fine powders. This is also how some ginger root powders, flower powders (like lavender, rose, calendula, etc.) and a few others are made.
fresh cassava and peels and slices on rustic wooden table2. Starch Production
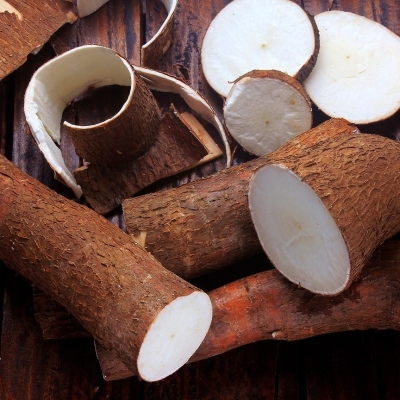
Certain plant powders like arrowroot powder are actually starch. These plant powders are made by separating the starch from plant root which has been cut and mashed into pulp. This pulp is strained through a screen to obtain fine starch which is then, dried and ground into fine powder.

3. Spray Drying
organic_strawberry_powder
While some powders like lemon powder and beetroot powder can be made by grinding the rind (for lemon) or the entire root (for beetroot), there’s another way for these powders to be made and that’s spray drying. This process involves spraying concentrated fruit juice in a chamber with hot air, allowing the droplets to dry before the dried particles are separated and filtered. Some of Craftiviti’s plant powders that are created through this process are Organic Lemon Powder, Organic Strawberry Powder and Organic Mango Powder.
~ * ~
Among the three, it can be said that plant powders made using the spray drying and grinding processes would hold the most nutrients and are therefore, more beneficial to us. However, this doesn’t mean that plants powders that are essentially starch, aren’t beneficial at all. All plant powders have their own pros and cons. So, depending on which formulation they’re incorporated in, they can either give your DIY personal care products a boost, or not.

Thanks for reading! We hope this helps ❤️

happy crafting
buy it

Tuesday, October 1, 2019

We Tried Making Resin Petri Dishes and Well…This Happened


Created by Josie Lewis, the Petrified Rainbow (also known as Resin Petri Dish and Resin Coasters) is a gorgeous, unpredictable type of resin art where a rainbow (or any other mix of colors used) is frozen in motion in a petri dish made of resin.

Awed by its beauty, we decided to give it a go and scoured the Internet for tutorials. Fortunately, our favorite site on all things resin art acrylgiessen.com has a tutorial just for Resin Petri Dishes! We got to work, setting aside the necessary tools and materials for this experiment but we hit a snag with every try and learned an important lesson:
Just like how not all epoxy resin is made equal, not all alcohol inks are made equal as well.
We used two types of Epoxy Resin for our attempt to make Resin Petri Dishes—the first is our own brand of Clear Epoxy Resin, and the second is Alumilite’s Amazing Clear Cast Epoxy Resin. For alcohol inks, we used Semiramis’ Alcohol Inks.
As noted by acrylgiessen.com, if the alcohol ink spreads immediately after being dropped into the resin, then the resin is pretty fluid. If it doesn’t spread much, then the resin has started to cure slightly. Unfortunately, this isn’t the case for both of the epoxy resin we used.
IMG_20190920_125610
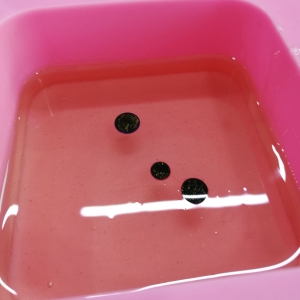
As you can see in the above picture, despite us immediately dropping ink into our resin after we’ve combined the resin and the hardener, it appears that our epoxy resin is too thick for our alcohol ink to penetrate it. We did the same for Alumilite’s and our alcohol ink couldn’t penetrate it as well.
So, in effort to save it, we mixed the resin with the alcohol inks and attempted to created petrified clouds of gold using a mixture of our 99.8% Isopropyl Alcohol and Aztec Gold Mica. The mica powder + Isopropyl Alcohol combo worked well!
IMG_20190920_125613
IMG_20190927_173544
We also noticed that despite using the same amount of alcohol ink (10 drops) and mica+isopropyl alcohol (10 drops), the intensity of the color differs between the two brands of Epoxy Resin. Semiramis’ Alcohol Inks are brilliant for coloring epoxy resin
IMG_20190927_173610
Top – Alumilite       Bottom – Craftiviti
Though, we did keep one (using Craftiviti’s Clear Epoxy Resin) as it is with the un-mixed alcohol inks as a reference. The Epoxy Resin cured completely in 24 hours, but the alcohol ink never dried. We left it aside for a few more days but it stayed wet!
IMG_20190927_173720
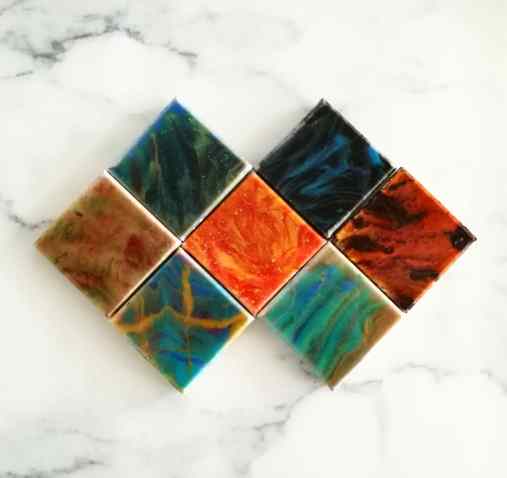
Afterwards, we added another layer of Epoxy Resin just to see what happens and well, the result is a (rather pretty) bleeding Epoxy Resin sandwich 😂
So, as with all art and crafts, it’s always best to do little tests first. Don’t go full-on until you’re sure that a technique will work!
That aside, just because we failed this time, doesn’t mean that we’re going to stop trying! Stayed tuned for when we finally figure out a tutorial for Resin Petri Dishes that won’t fail 💪

Have you tried making a Resin Petri Dish before? How did it turn out for you? We’d love to hear about your experience and thoughts down below!
Thanks for reading ❤️
happy crafting
buy it

Wednesday, September 11, 2019

Top 6 Essential Oils for Haze Season + Quick and Easy Herbal Roll-On DIY


With the haze getting worse in Malaysia, it’s a definite that our lungs are working harder than usual to defend themselves from the dust and whatever fine particles we breathe in. So, aside from drinking herbal tea or turning to medicine to clear your lungs, you can  also incorporate these essential oils into your daily routine! We’ll also leave a super quick and easy herbal roll-on DIY at the bottom for you so you can have your own pocket aromatherapy 😊
organic_eucalyptus_powder
1. Eucalyptus Essential Oil
If you’re thinking that Eucalyptus Essential Oil smells like Vicks VapoRub, you’re not wrong! Eucalyptus Oil is one of the active ingredients in Vicks VapoRub, and it (and the essential oil) is a great natural decongestant. Inhaling steam with Eucalyptus Essential Oil can help reduce and loosen mucus, so that you can cough it up.

672. Peppermint Essential Oil
There are a number of natural products for respiratory conditions which contains Peppermint Oil, be it the menthol crystal version of the essential oil version. When inhaled, peppermint creates a cooling sensation has a sharp enough scent that will not only perk you up but also help clear congestion. (Pssst! Many insects are also repelled by the smell of peppermint.)

Fresh Rosemary Herb grow outdoor. Rosemary leaves Close-up.
3. Rosemary Essential Oil
Aside from being great for soothing muscles, treating dandruff and skin infections, Rosemary Essential Oil contains cineole (like Eucalyptus) which can aid in breaking up mucus in the respiratory passages and reduce inflammation, thus clearing congestion. (1)

tea tree4. Tea Tree Essential Oil
Well known for it’s ability to eliminate bacteria, viruses, and fungi, and it’s antiseptic and anti-inflammatory properties, Tea Tree Essential Oil can prevent the growth of bacteria which causes sinus infections and respiratory issues. Inhaling steam with Tea Tree Essential Oil can help treat and ease the effects of coughs and colds.

cedarwood essential oil craftiviti eo5. Cedarwood Essential Oil
With a warm and smoky aroma, Cedarwood Essential Oil can be used to soothe asthma, congestion, cough, phlegm buildup, and other respiratory discomforts. It has antibacterial, anti-fungal, anti-inflammatory and calming properties (which helps to relax muscles, promote sleep and relieve anxiety).

frankinscense craftiviti essential oil eo6. Frankincense Essential Oil
Often used in incense and perfumes, Frankincense Essential Oil is traditionally valued for it’s positive effects on the respiratory system. It has been noted in many medicinal studies for it’s ability to treat coughs, catarrh, bronchitis, and asthma. (2) (3)

~ * ~
DIY Herbal Roll-On
What You’ll Need
  1. Amber Glass Roll-On Bottle (to protect the contents from UV light!)
  2. Sweet Almond Oil (Or any other carrier oil of your choice!)
  3. Any of the 6 Essential Oils Listed Above
Instructions
  1. Pour in 9ml of sweet almond oil into the amber glass roll-on bottle. (If you’re using a different container, pour until the neck of the container or until it’s 95-98% full).
  2. Add in up to 6 drops of essential oil.
    *Note: Generally, we recommend 5 drops of essential oil for every 10ml of carrier oil to avoid any negative reactions due to skin sensitivity.
  3. Put on the stopper with the metal ball and shake the bottle before using.

We hope this post helps you ❤
happy crafting
References:
  1. Fischer, Juergen, and Uwe Dethlefsen, “Efficacy Of Cineole In Patients Suffering From Acute Bronchitis: A Placebo-Controlled Double-Blind Trial”, Cough, 9 (2013), 25 <https://doi.org/10.1186/1745-9974-9-25&gt;.
  2. Hamidpour, Rafie, Soheila Hamidpour, Mohsen Hamidpour, and Mina Shahlari, “Frankincense (乳香 Rǔ Xiāng; Boswellia Species): From The Selection Of Traditional Applications To The Novel Phytotherapy For The Prevention And Treatment Of Serious Diseases”, Journal Of Traditional And Complementary Medicine, 3 (2013), 221-226 <https://doi.org/10.4103/2225-4110.119723&gt;.
  3. Wakefield, Mary Elizabeth, “Special Treatments”, Constitutional Facial Acupuncture, 2014, 267-276 <https://doi.org/10.1016/b978-0-7020-4947-7.00008-7&gt;.
Pssst, we're also available at Craftiviti.com!

Wednesday, August 21, 2019

Epoxy Resin and Resin Art


If you’ve seen gorgeous and nearly realistic art of the ocean going around social media, it’s most likely done using epoxy resin. But, what is epoxy resin? How do we create art with it?

What is epoxy resin?

Epoxy resin is a brilliant medium that’s lustrous like glass but with a composition like plastic. It pairs form with functionality, resulting in endless artistic possibilities like fairy pendants, seascape art, pseudo-marble vanities, and wood river tables. It’s experimental nature and ethereal aesthetic allows for gorgeous results. Best of all, it’s non-toxic, odorless and does not give off poisonous fumes like polyester resin.
craftiviti epoxy resin fluid art abstract on canvas

How do we create art with it?

There are many ways in which art can be created from epoxy resin. You can make statues with it through the usage of silicone moulds; encase plants, sand, stones, toys and more inside resin; or simply create fluid art by colouring the resin and pouring it over any surface like a table top or a canvas.
craftiviti epoxy resin clearEpoxy resin comes in two parts: resin and hardener. They are normally mixed together according to a 1:1, 2:1 or 3:1 ratio. The bottle label will indicate the mixing ratio. When mixed correctly according to ratio, the resin and hardener will react with each other and gradually harden into a hard glossy plastic. An inaccurate measurement of either part will result in a piece that won’t harden properly.
*The Clear Epoxy Resin we sell at our store has a 2:1 ratio. We also have other types of epoxy resin that you can find at our store!

Safety always comes first!

Take care while handling epoxy resin! It’s important to work in a well-ventilated area, to wear latex gloves, and to protect the surface of your work space with silicone mats or plastic sheets. Epoxy resin is difficult to get rid of when it comes in contact with other surfaces! Also, if you’ve accidentally gotten epoxy resin on your skin, immediately rub Vaseline onto the area and wash it.

Want to know more?

Check out this comprehensive post by acrylgiessen.com on the Basics for your first Steps in Resin Art 😍


Thank you for reading! We hope this helps ❤
happy crafting
Pssst, we're also available at Craftiviti.com!

Thursday, August 8, 2019

Why you shouldn’t add breast milk (or any fresh ingredient) to Melt and Pour Soap Bases


Hi Crafters!
There has been an increase in new mothers asking us if they can make breast milk soap with melt and pour soap bases, and this is a great concern because where is this misinformation coming from? We understand that every parent will want the best for their child (we would too, and for the parents as well!), but breast milk + melt and pour soap = a disaster waiting to happen.
You see, stainless_steel_soap_cutter_03any and all fresh ingredients shouldn’t be added into melt and pour soap because these ingredients will not become soap. It’s like adding melted chocolate to your perfectly-baked and smooth vanilla cake. You can either cover your cake with the chocolate, or inject it into the body of the cake, but at the end of the day, the chocolate and the cake are still separate from each other. They can’t seamlessly blend and become one  because the cake has already been made and baked before the chocolate was added.
So, in the case of melt and pour soap (henceforth known as MP Soap), the chemical process of saponification where the ingredients react with lye to become soap has already occurred.* It’s too late to incorporate fresh ingredients like milk, honey and purees as these fresh ingredients will not become soap.
*Note: To know more about saponification and how cold process soap is made, check out this informative blog post of ours! 
stainless_steel_soap_cutter_04If that doesn’t deter you from adding fresh ingredients into MP soap bases (because MP soaps are just so easy and convenient to make!), let us tell you this truth: it will go bad, and when it does, it will be harmful to you.
With the humid weather in Malaysia and even if you use preservatives, the MP soap will eventually turn rancid and foul. Putting your MP soap in the fridge may help a little, but like with every other foodstuff, it will go bad. Milk left in the fridge will become rancid past its expiry date, just like how leaving milk out on your table will cause it to turn bad too. The only difference is the amount of time it takes for it to go bad.
So, fellow crafters, if you prefer MP soaps that have fresh ingredients in them, please purchase those that have already been specially formulated and saponified with those fresh ingredients (like Stephenson Personal Care’s Soap Bases, or our Goat’s Milk MP Soap Base). Alternatively, do explore the wonders of cold process soap! They require more effort to make, but it’s definitely worth it because you can customize every single ingredient added into cold process soaps.

Thank you for reading! We hope this helps ❤
happy crafting
Pssst, we're also available at Craftiviti.com!

JOIN US ON FACEBOOK