Showing posts with label fluid art. Show all posts

Friday, December 6, 2019

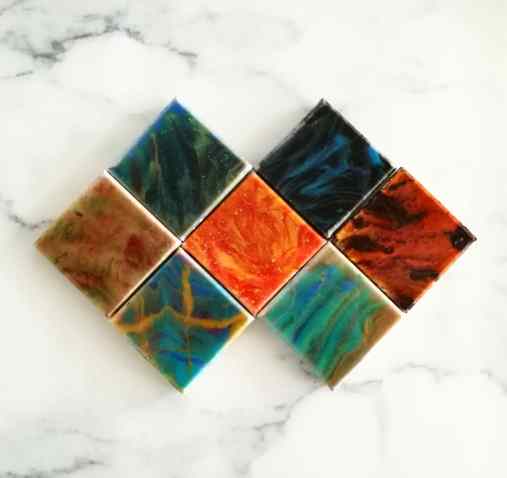
Simple Epoxy Resin Abstract Fluid Art DIY


Epoxy resin is a brilliant medium that’s lustrous like glass but with a composition like plastic. It pairs form with functionality, resulting in endless artistic possibilities like fairy pendants, seascape art, and wood river tables. It’s experimental nature and ethereal aesthetic allows for gorgeous results 😍
For today’s post, we’re going to share a simple epoxy resin abstract fluid art DIY.
bty
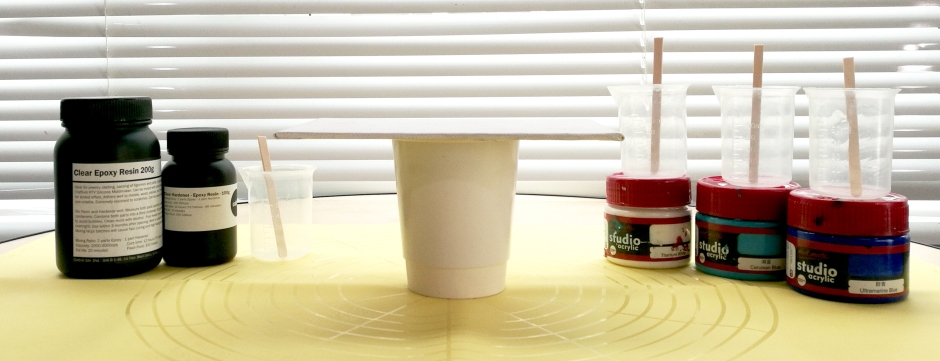
What You’ll Need:
  1. Clear Epoxy Resin and Hardener
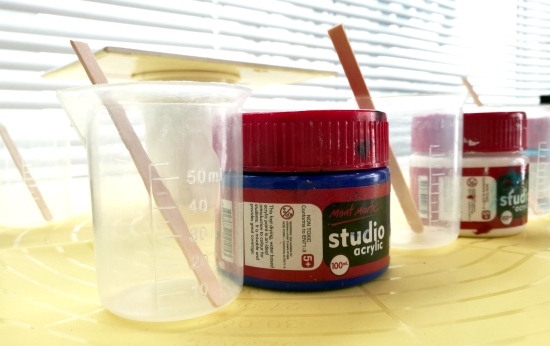
  2. Acrylic Paints 👉 We used these paints by Mont Marte
  3. Plastic Cups or Beakers
  4. Silicone Mat
  5. Popsicle Sticks
  6. Non-Powdered Latex Gloves
  7. Handheld Blowtorch
  8. Canvas
Instructions
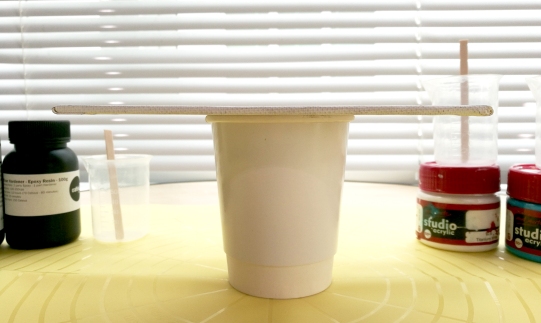
  1. On top of a silicone mat, place your canvas on plastic cups to elevate it. Make sure that the canvas is level to ensure a smooth and balanced surface for the resin to be poured on.
    bty
  2. Choose three colours of acrylic paints and set them aside with one popsicle stick and one plastic cup/beaker for each colour.bdr
  3. While wearing non-powdered latex gloves, carefully mix two parts of Craftiviti Clear Epoxy Resin with one part Craftiviti Clear Resin Hardener (Eg: 60ml of Craftiviti Clear Epoxy Resin + 30ml of Craftiviti Clear Resin Hardener). Mixing too fast will introduce a lot of bubbles into the mixture so make sure not to do that!
    *Note: The Pot Life of Craftiviti’s Clear Epoxy Resin and Hardener is 20 minutes. This means, you have 20 minutes to work with it after you’ve mixed the two parts.
  4. Separate the resin mixture into three different plastic cups.
  5. Add no more than 5% of acrylic paint to each cup of resin.
    (Eg: 30ml of resin will need up to 1.5ml of acrylic paint)
  6. Stir well to ensure that the acrylic paint mixes thoroughly with the resin. If not, you’ll end up with lumps!
  7. Pour the coloured resin on your canvas. Go wild, make sure to cover the entire surface!
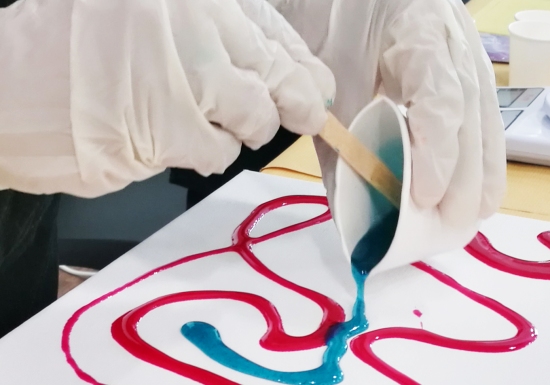
    bdr*Note: You can move the canvas around to make the resin shift. Or, you can use a hand-held heatgun as well.
  8. Use a blowtorch to pop the bubbles on the resin. Be careful not to burn your resin and your canvas.
  9. Cover your art so that dust or other particles doesn’t settle on it as it cures.
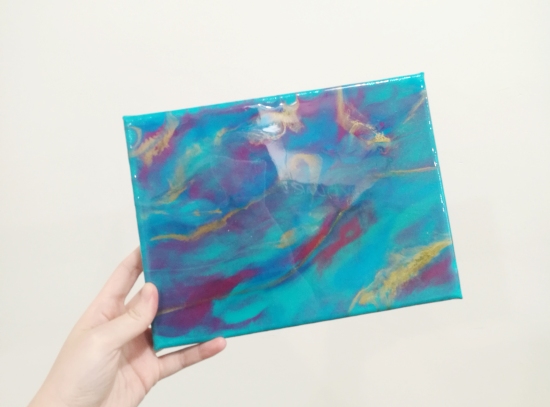
  10. Leave aside for 24-48 hours. Once fully cured, you can display your resin artwork.
bty

happy craftingbuy it

Wednesday, August 21, 2019

Epoxy Resin and Resin Art


If you’ve seen gorgeous and nearly realistic art of the ocean going around social media, it’s most likely done using epoxy resin. But, what is epoxy resin? How do we create art with it?

What is epoxy resin?

Epoxy resin is a brilliant medium that’s lustrous like glass but with a composition like plastic. It pairs form with functionality, resulting in endless artistic possibilities like fairy pendants, seascape art, pseudo-marble vanities, and wood river tables. It’s experimental nature and ethereal aesthetic allows for gorgeous results. Best of all, it’s non-toxic, odorless and does not give off poisonous fumes like polyester resin.
craftiviti epoxy resin fluid art abstract on canvas

How do we create art with it?

There are many ways in which art can be created from epoxy resin. You can make statues with it through the usage of silicone moulds; encase plants, sand, stones, toys and more inside resin; or simply create fluid art by colouring the resin and pouring it over any surface like a table top or a canvas.
craftiviti epoxy resin clearEpoxy resin comes in two parts: resin and hardener. They are normally mixed together according to a 1:1, 2:1 or 3:1 ratio. The bottle label will indicate the mixing ratio. When mixed correctly according to ratio, the resin and hardener will react with each other and gradually harden into a hard glossy plastic. An inaccurate measurement of either part will result in a piece that won’t harden properly.
*The Clear Epoxy Resin we sell at our store has a 2:1 ratio. We also have other types of epoxy resin that you can find at our store!

Safety always comes first!

Take care while handling epoxy resin! It’s important to work in a well-ventilated area, to wear latex gloves, and to protect the surface of your work space with silicone mats or plastic sheets. Epoxy resin is difficult to get rid of when it comes in contact with other surfaces! Also, if you’ve accidentally gotten epoxy resin on your skin, immediately rub Vaseline onto the area and wash it.

Want to know more?

Check out this comprehensive post by acrylgiessen.com on the Basics for your first Steps in Resin Art 😍


Thank you for reading! We hope this helps ❤
happy crafting
Pssst, we're also available at Craftiviti.com!

Wednesday, March 6, 2019

How to Make Pouring Medium for Fluid Art


A pouring medium is an additive used to improve paints. It allows for a smoother pour, improves the consistency and also the overall integrity of acrylic paints. Therefore, it acts as both a diluting agent and a binder. It helps a mix of acrylic paints to act more uniformly, and also allows them to dry and finish without cracking, separating or fading. In other words, pouring mediums make acrylic paints easier to work with. They also make acrylic paints more suitable for fluid art!
blog - acrylic-draw-paint-33709.jpg
But wait, why not use water instead of a pouring medium? Well, you see, the thing about water is that all it does is simply dilute. Not only will the colors of your acrylic paints lose their intensity, but the binding agent of the paints will also weaken. This means that they won’t adhere well to canvases or any other surface you’re going to do fluid art on.
Moreover, water doesn’t blend well with acrylic paint either. It’ll result in an uneven consistency, and possible flaking/lifting of the paint when it’s dry. So yeah, your artwork won’t have the same vibrancy, consistency and quality they should have. They also won’t last as long as they normally do.
Therefore, a pouring medium is the better choice when it comes to fluid art! They will provide the smooth, liquid-like consistency you’re looking for, while also keeping the integrity and vibrancy of the paint intact. They also may extend the drying time of acrylic paints, which allows you to work on your painting for a longer time. Best of all, pouring mediums have the ability to strengthen paints and prevent cracking and crazing.
*Crazing is a condition in which hairline cracks develop in the clear coat of two-stage paints.
It should be noted, however, that not all pouring mediums are the same. There are glossy mediums which provides a glossy finish to your artwork, matte mediums which give a matte finish, so on and so forth. Some are all-purpose mediums, and while some are create specially for the purpose of being used in art. Besides that, pouring mediums have different medium-to-paint ratios. Some pouring mediums also require a little water (which, we know is confusing because of the previous cons we’ve listed out, but don’t worry! The water added to pouring mediums that require them won’t negatively affect them and your artwork).
blog - IMG_20190306_163827_802.jpg
If you’re a beginner to fluid art, you can make your own pouring medium by following this recipe by Mont Marte:
*All of the following products are available at our store!
  1. Mont Marte PVA Glue – 3 parts
  2. Mont Marte Acrylic Gloss Medium – 1 part
  3. Water – 1.5 parts
  4. Mont Marte Acrylic Retarder – 37.5ml
*You can refer to this video tutorial to better understand their recipe!
The resulting pouring medium should be a similar consistency to pouring cream when you let it run off a palette knife. If it is the correct viscosity, it will run in a continuous flow when you lift the palette knife out of your mixture. If it is too thick, add a small amount of water until you achieve the desired result. Keep your mixture in an airtight container and store in a cool, dark place.
*PVA Glue can be used as a pouring medium as it does all the basics of a pouring medium well. It’s slightly acidic, though, so your resulting paintings wont have a long lifespan like archival pieces do. Nevertheless, it’s good for beginners who are just starting out!

Email us if you have any enquiries at enquiry@craftiviti.com or pop by Craftiviti Craft Store at 10 Boulevard, Petaling Jaya, Malaysia.
If you found this post useful, please join us on Craftiviti Facebook or Instagram for more updates and demos!

References:
  1. “Acrylic Pouring Medium Guide: Everything You Need To Know”, Acrylic Pouring, 2017 <https://acrylicpouring.com/what-is-a-pouring-medium/> [Accessed 6 March 2019].
  2. “How To Make Pouring Medium”, Mont Marte, 2017 <http://www.montmarte.net/creativeconnection/lessons-and-tips/show/how-to-make-pouring-medium> [Accessed 6 March 2019].
Pssst, we're also available at Craftiviti.com!

JOIN US ON FACEBOOK