Air dry clay is commonly used with children and as such, can sometimes be overlooked as a potential material to make some wonderful things like plant pots, wind chimes and jewelry. However, the idea of making stuff like the aforementioned may seem a little intimidating for those who know nothing about using air dry clay. So, today we’ve 7 Air Dry Clay ideas from all over the web for you to try out and start with!
But before that, you can purchase our Ultra Light Air Dry Clay or our Paper Clay (also air-dries) from our online store and our physical store.


Our Ultra Light Air Dry Clay…
1. Is incredibly easy to use and odourless.
2. Can be blended together to make new colours.
3. Dries with no cracks and has a bounce to it.
4. Retains a permanent shape after it hardens completely.
2. Can be blended together to make new colours.
3. Dries with no cracks and has a bounce to it.
4. Retains a permanent shape after it hardens completely.
Our Air Dry Paper Clay…
1. Is easy to model, non-toxic and odourless
2. Dries with no cracks.
3. Can be moistened and remodeled before it hardens completely.
4. Once dry, can be painted and varnished.
2. Dries with no cracks.
3. Can be moistened and remodeled before it hardens completely.
4. Once dry, can be painted and varnished.
1. DIY Young Buck Sculpture by make+haus

In a series of pictures, make+haus shows us how to make a really simple Young Buck Sculpture that you can hang anywhere around your house. No need for taxidermy over here!
Materials and tools needed:
~ White Ultra Light Air Dry Clay or White Paper Clay~ Clay Sculpting Tools
~ Twigs (make sure it’s dry and not damp)
~ Gold Paint
~ Paint Brush
~ White Spray Paint (use on paper clay if needed)
~ White Ultra Light Air Dry Clay or White Paper Clay~ Clay Sculpting Tools
~ Twigs (make sure it’s dry and not damp)
~ Gold Paint
~ Paint Brush
~ White Spray Paint (use on paper clay if needed)
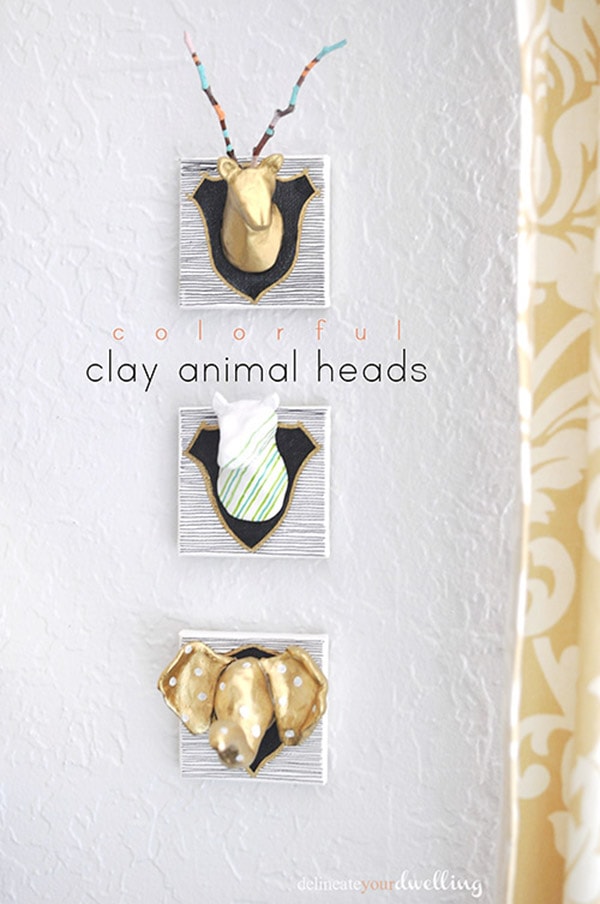
2. Colourful Clay Animal Heads by Delineate Your Dwelling

Or, if the Young Buck Sculpture is too typical, you can check out this tutorial by Amy from Delineate Your Dwelling. In the tutorial, she shows you how to make a zebra head and an elephant head sculptures too!
Materials and tools needed:
~ Mini Square Canvas (optional)
~ Twigs (make sure it’s dry and not damp.)
~ Acrylic Paint
~ Paint Brush
~ Paint Pens
~ Hot Glue (optional)
~ Paint Pens
~ Hot Glue (optional)
*We’ve listed some of the materials and tools as optional because you can follow the previous tutorial where a hole is scooped out of the back for hanging.
3. Air Dry Clay Mini Pots by Journey into Creativity

Have succulents around the house or little plants? (And if you don’t, maybe you’re planning to get some?) Here’s a tutorial where you can make your own hanging mini pots that’ll no doubt add a burst of colour to your home!
Materials and tools needed:~ Ultra Light Air Dry Clay (any colour) or White Paper Clay
~ Clay Sculpting Tools
~ Thick String
~ Paint (optional; we recommend using acrylic paint here)
~ Paint Brush (optional)
~ Thick String
~ Paint (optional; we recommend using acrylic paint here)
~ Paint Brush (optional)
4. DIY Faceted Clay Tea Light Holders by Gathering Beauty

Tea lights can be boring on their own. So, if you’ve been thinking of getting a tea light holder to make them more appealing, why not make your own faceted tea light holders by following Gathering Beauty‘s tutorial? It’s super easy and the holders will be more meaningful to you too!
Materials and tools needed:
~ Ultra Light Air Dry Clay or Paper Clay of any colour
~ Tealights
~ A knife
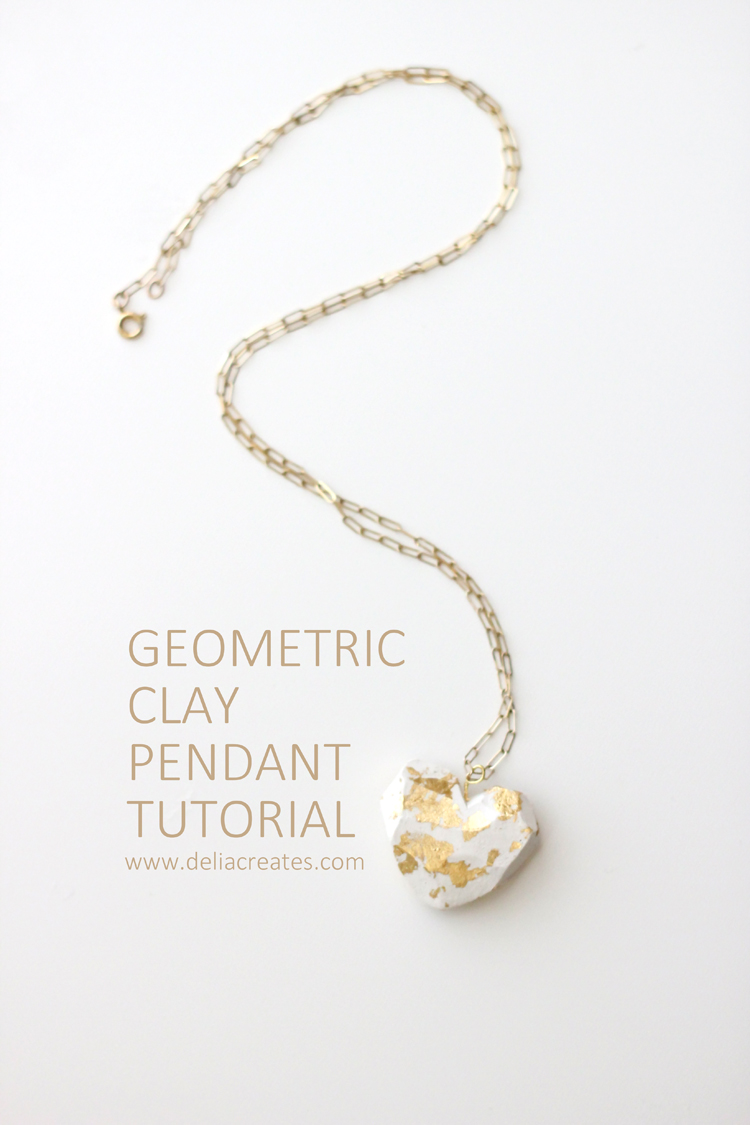
5. Geometric Clay Pendant Tutorial by Delia Creates

Been wanting to get some geometric accessories but the ones you like are too pricey? Here’s a simple tutorial by Delia Creates which you can follow to make your very own geometric clay pendant! The tutorial can also be adjusted according to whatever shape you’d like to make, or for whichever type of accessory you’re aiming for.
*For this, we recommend using Paper Clay as our Ultra Light Air Dry Clay may not harden into the kind of texture similar to the one in the tutorial.
Materials and tools needed:
~ Paper Clay of any colour
~ A knife
~ Long sewing pin or straightened paper clip
~ Head Pin
~ Needle nose pliers
~ Gold leafing kit (optional)
~ Paper Clay of any colour
~ A knife
~ Long sewing pin or straightened paper clip
~ Head Pin
~ Needle nose pliers
~ Gold leafing kit (optional)
6. DIY Torn Clay Bowls by Makery

Simple yet aesthetic, these torn clay bowls would look amazing on top of tables or vanities! To make your own, all you need to do is just follow this tutorial by Makery.
Materials and tools needed:
~ Ultra Light Air Dry Clay or Paper Clay of any colour
~ Bowls (to use as molds)
~ Rolling pin
~ Palette knife
~ Ultra Light Air Dry Clay or Paper Clay of any colour
~ Bowls (to use as molds)
~ Rolling pin
~ Palette knife
7. DIY Clay Wind Charm by Design Sponge

Whether placed outside or inside your home, wind charms are always a great addition. By following this tutorial by Design Sponge, you’ll be able to make your own simple yet lovely clay wind charms. (They don’t have to be a plain white or shaped the way the one in this tutorial is, too! You can always customize the design according to your preferences.
Materials and tools needed:
~ Ultra Light Air Dry Clay or Paper Clay of any colour
~ Disposable plastic wine glasses with detachable base (or something similar)
~ Cotton cord
~ Rolling pin
~ A knife
~ Ultra Light Air Dry Clay or Paper Clay of any colour
~ Disposable plastic wine glasses with detachable base (or something similar)
~ Cotton cord
~ Rolling pin
~ A knife
There’s an ocean of many other tutorials on the internet, but the 7 we’ve listed here are some of the easier ones and they’re good places to start with if you’re someone looking to try out some air-dry clay crafts!
Pssst, we're also available at Craftiviti.com!


No comments:
Post a Comment