Showing posts with label resin art. Show all posts

Friday, December 6, 2019

Simple Epoxy Resin Abstract Fluid Art DIY


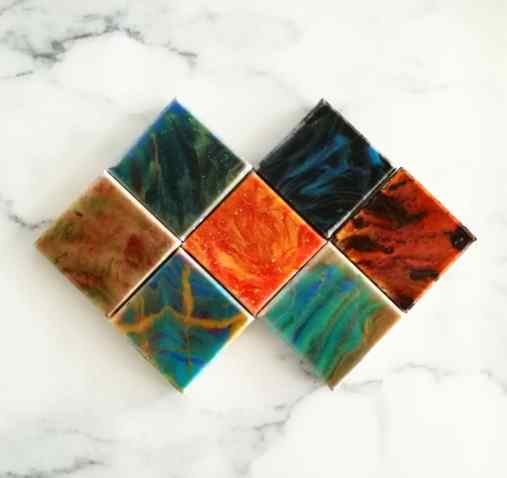
Epoxy resin is a brilliant medium that’s lustrous like glass but with a composition like plastic. It pairs form with functionality, resulting in endless artistic possibilities like fairy pendants, seascape art, and wood river tables. It’s experimental nature and ethereal aesthetic allows for gorgeous results 😍
For today’s post, we’re going to share a simple epoxy resin abstract fluid art DIY.
bty
What You’ll Need:
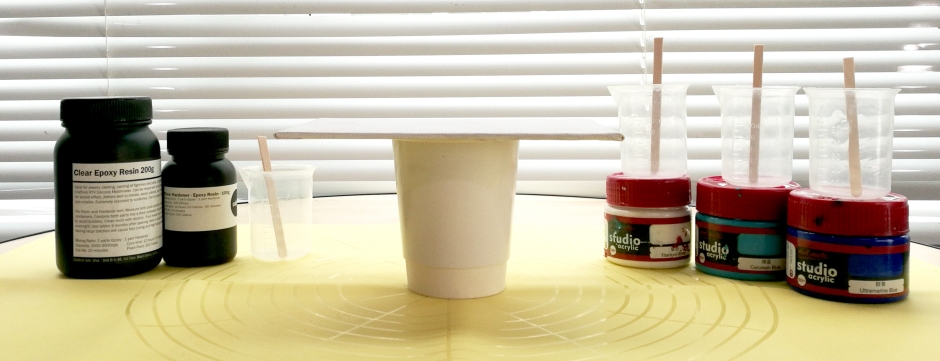
  1. Clear Epoxy Resin and Hardener
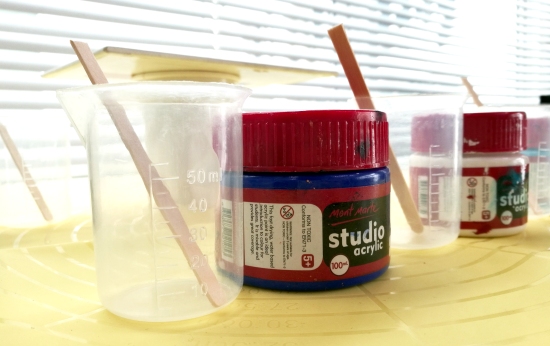
  2. Acrylic Paints 👉 We used these paints by Mont Marte
  3. Plastic Cups or Beakers
  4. Silicone Mat
  5. Popsicle Sticks
  6. Non-Powdered Latex Gloves
  7. Handheld Blowtorch
  8. Canvas
Instructions
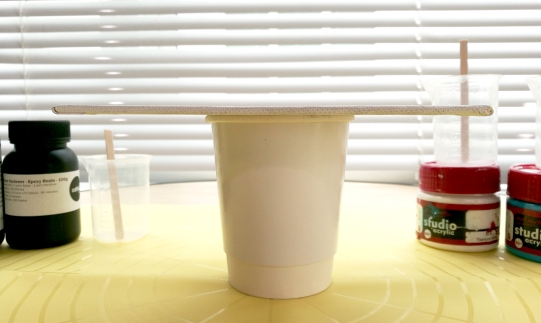
  1. On top of a silicone mat, place your canvas on plastic cups to elevate it. Make sure that the canvas is level to ensure a smooth and balanced surface for the resin to be poured on.
    bty
  2. Choose three colours of acrylic paints and set them aside with one popsicle stick and one plastic cup/beaker for each colour.bdr
  3. While wearing non-powdered latex gloves, carefully mix two parts of Craftiviti Clear Epoxy Resin with one part Craftiviti Clear Resin Hardener (Eg: 60ml of Craftiviti Clear Epoxy Resin + 30ml of Craftiviti Clear Resin Hardener). Mixing too fast will introduce a lot of bubbles into the mixture so make sure not to do that!
    *Note: The Pot Life of Craftiviti’s Clear Epoxy Resin and Hardener is 20 minutes. This means, you have 20 minutes to work with it after you’ve mixed the two parts.
  4. Separate the resin mixture into three different plastic cups.
  5. Add no more than 5% of acrylic paint to each cup of resin.
    (Eg: 30ml of resin will need up to 1.5ml of acrylic paint)
  6. Stir well to ensure that the acrylic paint mixes thoroughly with the resin. If not, you’ll end up with lumps!
  7. Pour the coloured resin on your canvas. Go wild, make sure to cover the entire surface!
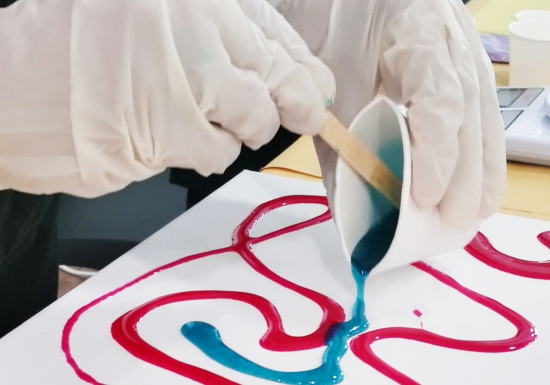
    bdr*Note: You can move the canvas around to make the resin shift. Or, you can use a hand-held heatgun as well.
  8. Use a blowtorch to pop the bubbles on the resin. Be careful not to burn your resin and your canvas.
  9. Cover your art so that dust or other particles doesn’t settle on it as it cures.
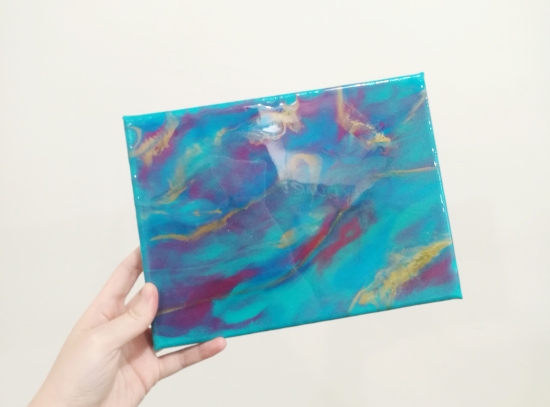
  10. Leave aside for 24-48 hours. Once fully cured, you can display your resin artwork.
bty

happy craftingbuy it

Tuesday, October 1, 2019

We Tried Making Resin Petri Dishes and Well…This Happened


Created by Josie Lewis, the Petrified Rainbow (also known as Resin Petri Dish and Resin Coasters) is a gorgeous, unpredictable type of resin art where a rainbow (or any other mix of colors used) is frozen in motion in a petri dish made of resin.

Awed by its beauty, we decided to give it a go and scoured the Internet for tutorials. Fortunately, our favorite site on all things resin art acrylgiessen.com has a tutorial just for Resin Petri Dishes! We got to work, setting aside the necessary tools and materials for this experiment but we hit a snag with every try and learned an important lesson:
Just like how not all epoxy resin is made equal, not all alcohol inks are made equal as well.
We used two types of Epoxy Resin for our attempt to make Resin Petri Dishes—the first is our own brand of Clear Epoxy Resin, and the second is Alumilite’s Amazing Clear Cast Epoxy Resin. For alcohol inks, we used Semiramis’ Alcohol Inks.
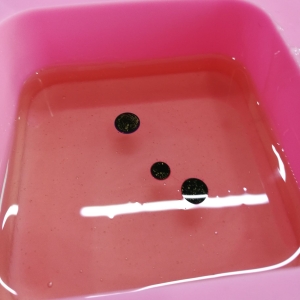
As noted by acrylgiessen.com, if the alcohol ink spreads immediately after being dropped into the resin, then the resin is pretty fluid. If it doesn’t spread much, then the resin has started to cure slightly. Unfortunately, this isn’t the case for both of the epoxy resin we used.
IMG_20190920_125610
As you can see in the above picture, despite us immediately dropping ink into our resin after we’ve combined the resin and the hardener, it appears that our epoxy resin is too thick for our alcohol ink to penetrate it. We did the same for Alumilite’s and our alcohol ink couldn’t penetrate it as well.
So, in effort to save it, we mixed the resin with the alcohol inks and attempted to created petrified clouds of gold using a mixture of our 99.8% Isopropyl Alcohol and Aztec Gold Mica. The mica powder + Isopropyl Alcohol combo worked well!
IMG_20190920_125613
IMG_20190927_173544
We also noticed that despite using the same amount of alcohol ink (10 drops) and mica+isopropyl alcohol (10 drops), the intensity of the color differs between the two brands of Epoxy Resin. Semiramis’ Alcohol Inks are brilliant for coloring epoxy resin
IMG_20190927_173610
Top – Alumilite       Bottom – Craftiviti
Though, we did keep one (using Craftiviti’s Clear Epoxy Resin) as it is with the un-mixed alcohol inks as a reference. The Epoxy Resin cured completely in 24 hours, but the alcohol ink never dried. We left it aside for a few more days but it stayed wet!
IMG_20190927_173720
Afterwards, we added another layer of Epoxy Resin just to see what happens and well, the result is a (rather pretty) bleeding Epoxy Resin sandwich 😂
So, as with all art and crafts, it’s always best to do little tests first. Don’t go full-on until you’re sure that a technique will work!
That aside, just because we failed this time, doesn’t mean that we’re going to stop trying! Stayed tuned for when we finally figure out a tutorial for Resin Petri Dishes that won’t fail 💪

Have you tried making a Resin Petri Dish before? How did it turn out for you? We’d love to hear about your experience and thoughts down below!
Thanks for reading ❤️
happy crafting
buy it

Wednesday, August 21, 2019

Epoxy Resin and Resin Art


If you’ve seen gorgeous and nearly realistic art of the ocean going around social media, it’s most likely done using epoxy resin. But, what is epoxy resin? How do we create art with it?

What is epoxy resin?

Epoxy resin is a brilliant medium that’s lustrous like glass but with a composition like plastic. It pairs form with functionality, resulting in endless artistic possibilities like fairy pendants, seascape art, pseudo-marble vanities, and wood river tables. It’s experimental nature and ethereal aesthetic allows for gorgeous results. Best of all, it’s non-toxic, odorless and does not give off poisonous fumes like polyester resin.
craftiviti epoxy resin fluid art abstract on canvas

How do we create art with it?

There are many ways in which art can be created from epoxy resin. You can make statues with it through the usage of silicone moulds; encase plants, sand, stones, toys and more inside resin; or simply create fluid art by colouring the resin and pouring it over any surface like a table top or a canvas.
craftiviti epoxy resin clearEpoxy resin comes in two parts: resin and hardener. They are normally mixed together according to a 1:1, 2:1 or 3:1 ratio. The bottle label will indicate the mixing ratio. When mixed correctly according to ratio, the resin and hardener will react with each other and gradually harden into a hard glossy plastic. An inaccurate measurement of either part will result in a piece that won’t harden properly.
*The Clear Epoxy Resin we sell at our store has a 2:1 ratio. We also have other types of epoxy resin that you can find at our store!

Safety always comes first!

Take care while handling epoxy resin! It’s important to work in a well-ventilated area, to wear latex gloves, and to protect the surface of your work space with silicone mats or plastic sheets. Epoxy resin is difficult to get rid of when it comes in contact with other surfaces! Also, if you’ve accidentally gotten epoxy resin on your skin, immediately rub Vaseline onto the area and wash it.

Want to know more?

Check out this comprehensive post by acrylgiessen.com on the Basics for your first Steps in Resin Art 😍


Thank you for reading! We hope this helps ❤
happy crafting
Pssstwe're also available at Craftiviti.com!

JOIN US ON FACEBOOK