

Epoxy resin is a brilliant medium that’s lustrous like glass but with a composition like plastic. It pairs form with functionality, resulting in endless artistic possibilities like fairy pendants, seascape art, and wood river tables. It’s experimental nature and ethereal aesthetic allows for gorgeous results 
For today’s post, we’re going to share a simple epoxy resin abstract fluid art DIY.
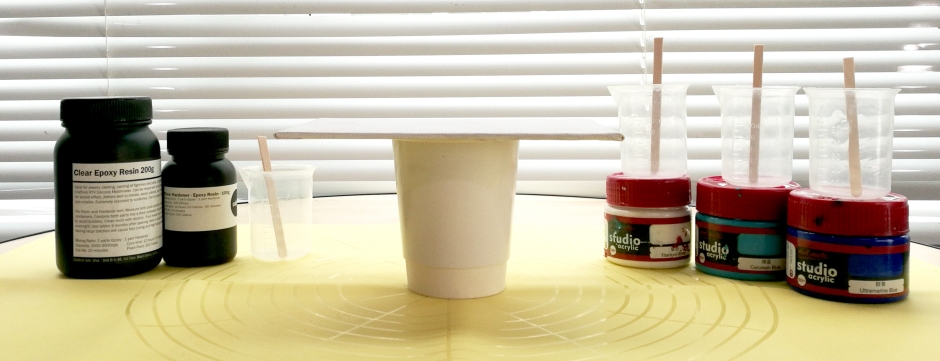
What You’ll Need:
- Clear Epoxy Resin and Hardener
- Acrylic Paints
 We used these paints by Mont Marte
 - Plastic Cups or Beakers
- Silicone Mat
- Popsicle Sticks
- Non-Powdered Latex Gloves
- Handheld Blowtorch
- Canvas
Instructions
- On top of a silicone mat, place your canvas on plastic cups to elevate it. Make sure that the canvas is level to ensure a smooth and balanced surface for the resin to be poured on.

- Choose three colours of acrylic paints and set them aside with one popsicle stick and one plastic cup/beaker for each colour.

- While wearing non-powdered latex gloves, carefully mix two parts of Craftiviti Clear Epoxy Resin with one part Craftiviti Clear Resin Hardener (Eg: 60ml of Craftiviti Clear Epoxy Resin + 30ml of Craftiviti Clear Resin Hardener). Mixing too fast will introduce a lot of bubbles into the mixture so make sure not to do that!
*Note: The Pot Life of Craftiviti’s Clear Epoxy Resin and Hardener is 20 minutes. This means, you have 20 minutes to work with it after you’ve mixed the two parts. - Separate the resin mixture into three different plastic cups.
- Add no more than 5% of acrylic paint to each cup of resin.
(Eg: 30ml of resin will need up to 1.5ml of acrylic paint) - Stir well to ensure that the acrylic paint mixes thoroughly with the resin. If not, you’ll end up with lumps!
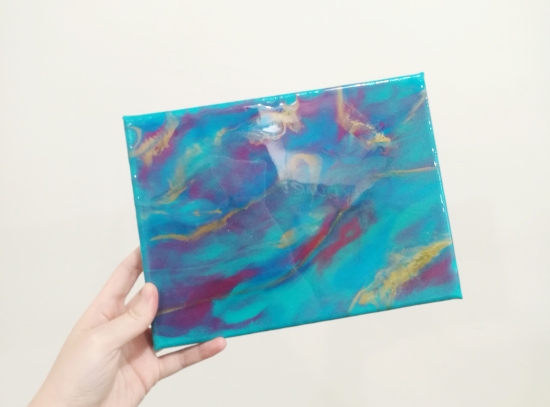
- Pour the coloured resin on your canvas. Go wild, make sure to cover the entire surface!
 *Note: You can move the canvas around to make the resin shift. Or, you can use a hand-held heatgun as well.
 - Use a blowtorch to pop the bubbles on the resin. Be careful not to burn your resin and your canvas.
- Cover your art so that dust or other particles doesn’t settle on it as it cures.
- Leave aside for 24-48 hours. Once fully cured, you can display your resin artwork.


No comments:
Post a Comment