With the month of giving approaching, we thought of sharing a few artsy and crafty Christmas Gift ideas to help kick start your journey of getting the right presents for the right people 
1. Rubber Stamping
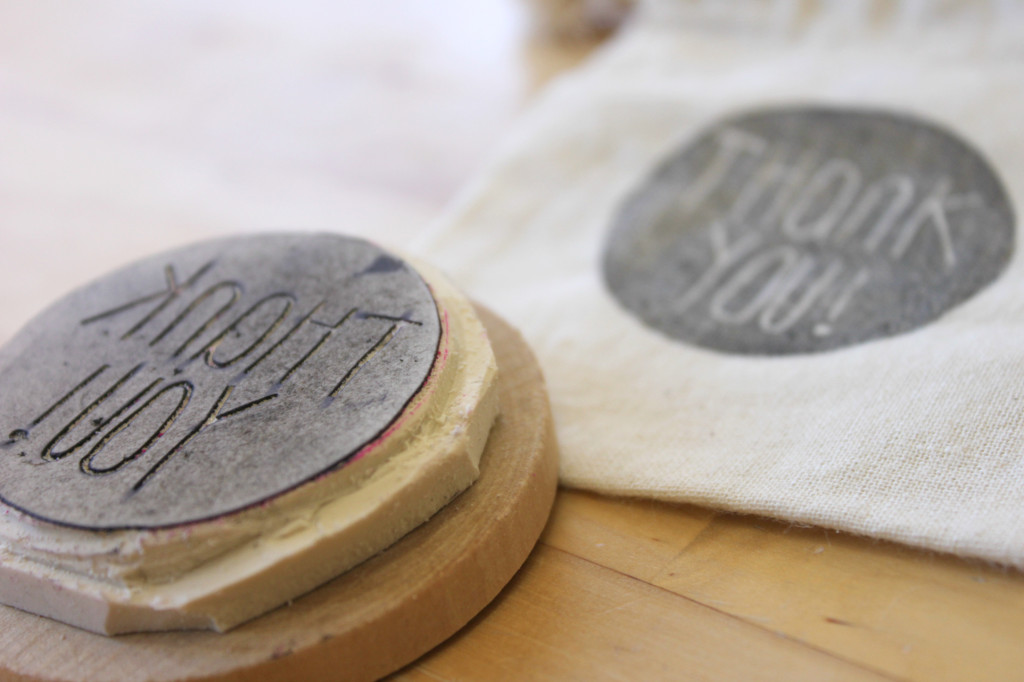
A craft that can bring calmness to some because of the act of carving rubber to make stamps and the act of stamping itself. It’s easy to create rubber stamps, though be careful when handling blades!
You can create simple greetings or Christmas elements like reindeer, trees, candy canes and more on rubber blocks. All you need are tracing skills and patience when it comes to the carving 
~ * ~
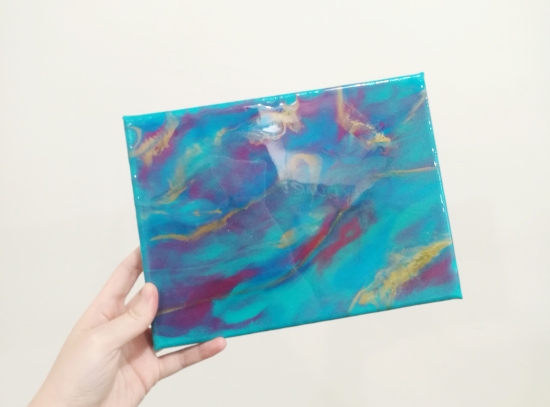
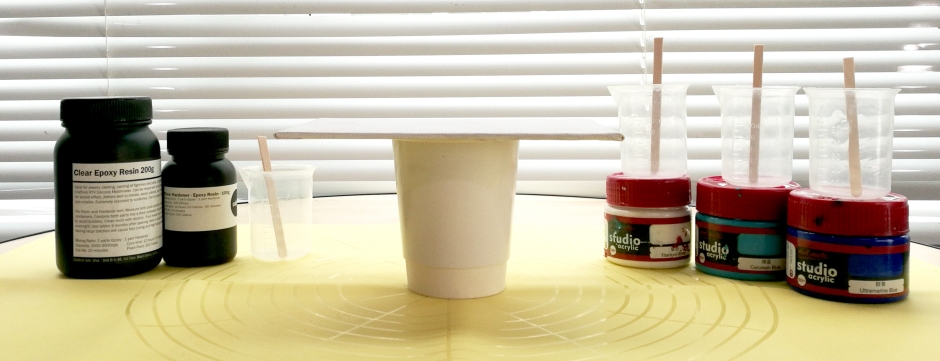
2. Resin Greeting Ornament
Epoxy resin is brilliant for creating beautiful and functional pieces. You can coat surfaces or cast something with it. Once hardened, you can write on it with paint markers!
What You’ll Need:
– Clear Epoxy Resin
– Acrylic Paint or Mica Powder
– Something to Pour On/In
(ie: canvas, silicone mold, laser cut wooden key chain)
– Paint Marker
– Plastic Cups
– Popsicle Sticks
– Gloves
– Clear Epoxy Resin
– Acrylic Paint or Mica Powder
– Something to Pour On/In
(ie: canvas, silicone mold, laser cut wooden key chain)
– Paint Marker
– Plastic Cups
– Popsicle Sticks
– Gloves
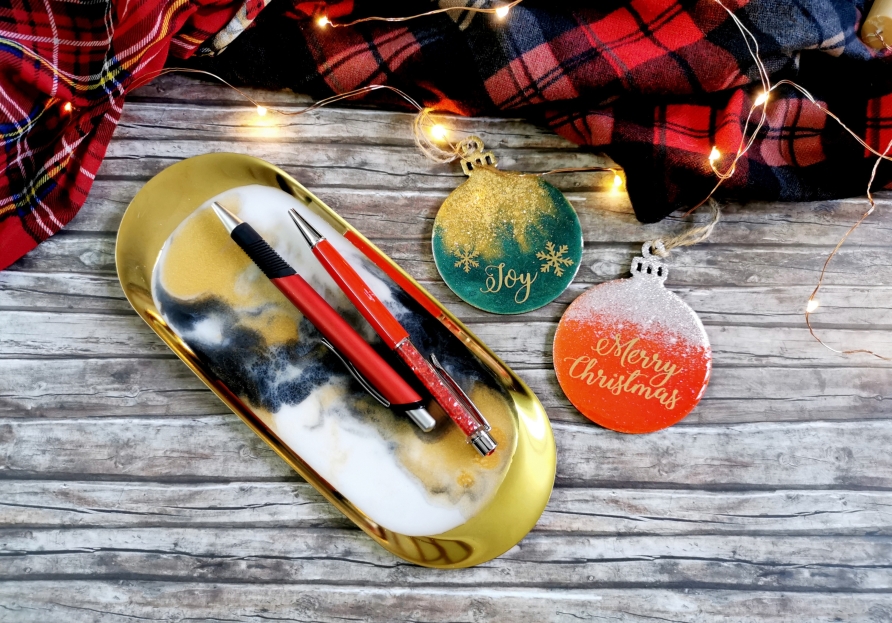
Pssst! We’re having a workshop where you can learn how to work with epoxy resin and create your own personalized and unique Christmas Ornament and Multipurpose Tray. Click here to find out more and to join!
~ * ~
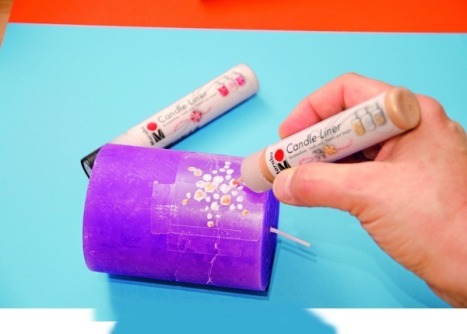
3. Decorative Christmas Greeting Pillar Candle
Marabu Candle liners are prefect for quick doodles or messages on candles. All you need is just one or two (or more) of those candle liners and a candle to work on, and you’re good to go!
What You’ll Need:
– Marabu Candle Liner (we have a few in store, so you can get it from us too!)
– Candle
– Marabu Candle Liner (we have a few in store, so you can get it from us too!)
– Candle
~ * ~
4. Yellow Craft Box
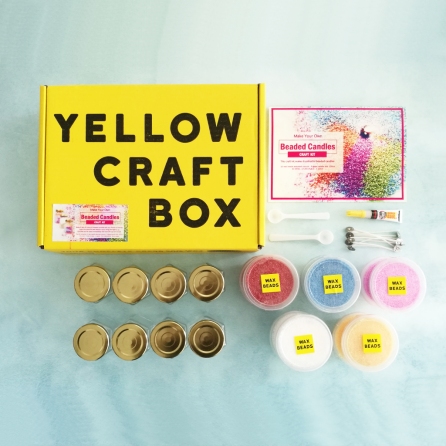
Your complete craft project in one box! The Yellow Craft Box is perfect for kids and beginners as well. Our current range of Yellow Craft Boxes includes a soap making kit, an easy no-flame (except for when you light it up at the end) candle making kit, and a name stone kit 
What You’ll Need:
– Yellow Craft Box
– Yellow Craft Box
You can use one of these kits to make a bunch of Christmas gifts for your loved ones, or simply gift the entire kit itself to your artsy and crafty friends!
~ * ~
5. Colorpy Kit
Colorpy utilizes the concept of water/paper marbling where patterns are drawn using pigments on a liquid before being transferred to an absorbent surface, such as paper or fabric. These series of kid- and beginner- friendly kits allows anyone to craft to their heart’s desire and transfer gorgeous patterns on just about any medium.
What You’ll Need:
– Colorpy Kit (comes with 6 Bottles of color (30g each), a Bottle of Magic Agent (200g), 10 Sheets of Card Paper, a Magic Wand and a A5 Tray)
– Colorpy Kit (comes with 6 Bottles of color (30g each), a Bottle of Magic Agent (200g), 10 Sheets of Card Paper, a Magic Wand and a A5 Tray)
You can use one of these kits to make a bunch of Christmas cards, scarves, rock paper weights and more for your loved ones. Or, you can gift the entire kit as well!
~ * ~
6. Botanical Wax Sachets
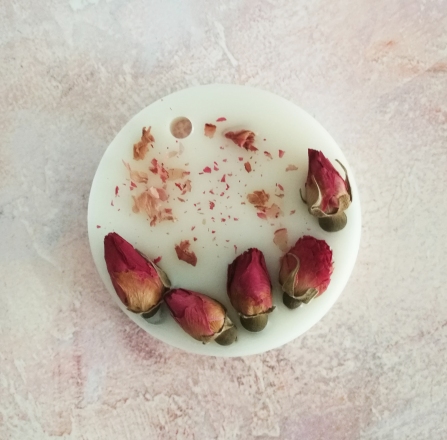
Not only wax sachets are pretty little tablets you can leave near a sunny spot in your room for some gentle fragrance release, they can also double as Christmas ornaments (and make awesome gifts)!
What You’ll Need:
– Natural Pillar Soywax
– Dried Rose Buds
– Dried Amaranth Globe Flowers
– Essential Oils or Fragrance Oils
– Wax Sachet Silicone Molds like these 30g molds
– Natural Pillar Soywax
– Dried Rose Buds
– Dried Amaranth Globe Flowers
– Essential Oils or Fragrance Oils
– Wax Sachet Silicone Molds like these 30g molds
~ * ~
7. DIY Leather Craft Kits

Know someone with an appreciation for leather products? You can get these beginner-friendly DIY Leather Craft Kits and make one for them, or simply gift the entire DIY Leather Craft Kit to them!
What You’ll Need:
– DIY Leather Craft Kit (comes with pre-punched leather parts, instruction manual, a stitching manual, thread & needles, and a leather care guide).
– DIY Leather Craft Kit (comes with pre-punched leather parts, instruction manual, a stitching manual, thread & needles, and a leather care guide).


 We used