Wednesday, September 25, 2019

DIY Soothing and Moisturizing Lavender Lotion


One of the most popular essential oils in aromatherapy, Lavender Essential Oil is known  for it’s ability to promote relaxation. In addition to it’s anti-fungal, anti-inflammatory, antidepressant, antiseptic, antimicrobial and antibacterial properties, it’s also said to be detoxifying, and has the ability to relieve spasm of involuntary muscle and pain.
So yes, it’s a definite that we’d incorporate it into our DIY lotion!
bty
What you’ll need:
  1. Craftiviti’s CP Lotion Maker
  2. Distilled Water
  3. Lavender Essential Oil
  4. Jojoba Oil
  5. (Optional) Preservative 👉 We used Liquid Germall Plus here, but you can opt for Ecocert Preservative – Tea Tree Oil Extract!
  6. Container 👉 We used this Amber Glass Jar (50g)
  7. Stirrer
  8. Beaker
  9. Measuring Spoon
Instructions (for approx 50g of lotion)
  1. In a beaker, measure 50ml of distilled water.
  2. Add in 2ml of Craftiviti’s CP Lotion Maker.bty
  3. Stir until they blend and the texture thickens into a creamy consistency.bty
  4. Add in 5ml of Jojoba Oil and up to 5 drops of Lavender Essential Oil. Stir until blended evenly.
  5. (Optional) Add in one drop of Liquid Germall Plus or Ecocert Preservative – Tea Tree Oil Extract. This will extend the shelf life of the lotion to 6 days. Without it, the lotion will only last for 3 days in the fridge.bty
  6. Scoop the lotion into your choice of container. It’s now ready to be used!
bty
happy crafting

Wednesday, September 11, 2019

Top 6 Essential Oils for Haze Season + Quick and Easy Herbal Roll-On DIY


With the haze getting worse in Malaysia, it’s a definite that our lungs are working harder than usual to defend themselves from the dust and whatever fine particles we breathe in. So, aside from drinking herbal tea or turning to medicine to clear your lungs, you can  also incorporate these essential oils into your daily routine! We’ll also leave a super quick and easy herbal roll-on DIY at the bottom for you so you can have your own pocket aromatherapy 😊
organic_eucalyptus_powder
1. Eucalyptus Essential Oil
If you’re thinking that Eucalyptus Essential Oil smells like Vicks VapoRub, you’re not wrong! Eucalyptus Oil is one of the active ingredients in Vicks VapoRub, and it (and the essential oil) is a great natural decongestant. Inhaling steam with Eucalyptus Essential Oil can help reduce and loosen mucus, so that you can cough it up.

672. Peppermint Essential Oil
There are a number of natural products for respiratory conditions which contains Peppermint Oil, be it the menthol crystal version of the essential oil version. When inhaled, peppermint creates a cooling sensation has a sharp enough scent that will not only perk you up but also help clear congestion. (Pssst! Many insects are also repelled by the smell of peppermint.)

Fresh Rosemary Herb grow outdoor. Rosemary leaves Close-up.
3. Rosemary Essential Oil
Aside from being great for soothing muscles, treating dandruff and skin infections, Rosemary Essential Oil contains cineole (like Eucalyptus) which can aid in breaking up mucus in the respiratory passages and reduce inflammation, thus clearing congestion. (1)

tea tree4. Tea Tree Essential Oil
Well known for it’s ability to eliminate bacteria, viruses, and fungi, and it’s antiseptic and anti-inflammatory properties, Tea Tree Essential Oil can prevent the growth of bacteria which causes sinus infections and respiratory issues. Inhaling steam with Tea Tree Essential Oil can help treat and ease the effects of coughs and colds.

cedarwood essential oil craftiviti eo5. Cedarwood Essential Oil
With a warm and smoky aroma, Cedarwood Essential Oil can be used to soothe asthma, congestion, cough, phlegm buildup, and other respiratory discomforts. It has antibacterial, anti-fungal, anti-inflammatory and calming properties (which helps to relax muscles, promote sleep and relieve anxiety).

frankinscense craftiviti essential oil eo6. Frankincense Essential Oil
Often used in incense and perfumes, Frankincense Essential Oil is traditionally valued for it’s positive effects on the respiratory system. It has been noted in many medicinal studies for it’s ability to treat coughs, catarrh, bronchitis, and asthma. (2) (3)

~ * ~
DIY Herbal Roll-On
What You’ll Need
  1. Amber Glass Roll-On Bottle (to protect the contents from UV light!)
  2. Sweet Almond Oil (Or any other carrier oil of your choice!)
  3. Any of the 6 Essential Oils Listed Above
Instructions
  1. Pour in 9ml of sweet almond oil into the amber glass roll-on bottle. (If you’re using a different container, pour until the neck of the container or until it’s 95-98% full).
  2. Add in up to 6 drops of essential oil.
    *Note: Generally, we recommend 5 drops of essential oil for every 10ml of carrier oil to avoid any negative reactions due to skin sensitivity.
  3. Put on the stopper with the metal ball and shake the bottle before using.

We hope this post helps you ❤
happy crafting
References:
  1. Fischer, Juergen, and Uwe Dethlefsen, “Efficacy Of Cineole In Patients Suffering From Acute Bronchitis: A Placebo-Controlled Double-Blind Trial”, Cough, 9 (2013), 25 <https://doi.org/10.1186/1745-9974-9-25&gt;.
  2. Hamidpour, Rafie, Soheila Hamidpour, Mohsen Hamidpour, and Mina Shahlari, “Frankincense (乳香 Rǔ Xiāng; Boswellia Species): From The Selection Of Traditional Applications To The Novel Phytotherapy For The Prevention And Treatment Of Serious Diseases”, Journal Of Traditional And Complementary Medicine, 3 (2013), 221-226 <https://doi.org/10.4103/2225-4110.119723&gt;.
  3. Wakefield, Mary Elizabeth, “Special Treatments”, Constitutional Facial Acupuncture, 2014, 267-276 <https://doi.org/10.1016/b978-0-7020-4947-7.00008-7&gt;.
Pssst, we're also available at Craftiviti.com!

Craftiviti’s Yellow Craft Box – Your Complete Craft Project In One Box!

Oftentimes, we get customers who come to our store with an idea to pick up a new craft but not knowing where to start. We’re not trying to blow our own trumpet, but our store’s a mini Wonderland of DIY personal care and therapeutic craft materials 😉 So yeah, we definitely understand if some get overwhelmed by the many choices or lost!
IMG_20181122_172055As a result, we came up with our Yellow Craft Box that’s beginner friendly for those aged 4+! With this box, you’ll have your entire project kit for a specific craft in your hands—free of fuss and totally not complicated at all. We’ve also included instructions on how to do your choice of craft, plus a video tutorial you can easily access via QR Code scanner.
Also, depending on what kit it is, the only other thing you’ll need in order to do your craft project can be readily found in the comforts of your own home. For example, a stove for your double boiler or a microwave to melt your soap base if you’re crafting using our Strawberry & Cream Soap Craft Kit!
Yellow Craft Box ycb craftiviti
With our Yellow Craft Box (which we also affectionately call ‘YCB’ for short), learning a new craft is now easier. You can craft just about whenever, wherever! It’s also a brilliant gift for those who love arts and crafts (or science!).
Pssst! Our Yellow Craft Boxes are limited edition so once a version is gone, it’s gone for good! So get yours ASAP before that happens from our website or our physical store at 10 Boulevard, Petaling Jaya, Malaysia.
The Contents of our Beaded Candle Kit where the only time you need a flame is when you light up the candle! Check out our YouTube for more videos.
happy crafting
 Pssst, we're also available at Craftiviti.com!

Thursday, August 29, 2019

DIY Chamomile and Green Tea Organic Melt and Pour Soap


Certified organic to the COSMOS standard, Stephenson personal Care’s Crystal OMP (Organic Melt and Pour) Soap Base is perfect for those looking for an option that has lesser chemicals. This melt & pour soap is vegetable-derived and contains no unapproved MPG or synthetic surfactants. It’s natural brown colour comes from the organic oils and sugar used in it’s formulation.

Picture by Stephenson Personal Care. To know more about this product, click here!

What You’ll Need
  1. Stephenson Personal Care’s Crystal OMP Soap Base
  2. 100% Calendula Oil (optional; any other carrier oil is fine too)
    Some Known Benefits 👉 has powerful antifungal, anti-inflammatory, and antibacterial properties; also helps promote healing and moisturizes skin while nourishing it
  3. Refined Glycerin USP 99.5%
    Some known benefits 👉 maintains water balance in skin; assists in the healing process of skin while also protecting it; makes skin soft and supple.
  4. Green Tea Powder
    Some known benefits 👉 a natural antiseptic; helps to restore the skin’s delicate pH balance; contains a powerful antioxidant called EGCG that reduces skin damage and signs of aging; helps maintain collagen levels for youthful skin structure and firmness
  5. 100% Pure Chamomile Essential Oil
    Some known benefits 👉 soothes irritated skin; brightens skin tone; refreshes skin and promotes skin health; relieves stress
  6. Silicone Mold 👉 We used this koi fish one which makes approx 40g of soap each!
  7. Double Boiler
  8. 1ml Measuring Spoon
stephenson personal care OMP soap craftiviti DIY melt and pour soap 1
Instructions
  1. Cut the soap base into small pieces and melt it in a double boiler.
    *Note: If you’re using the same mold as us, you’ll need 240g of soap base for 6 koi fishes.
  2. While the soap base is melting, create a slurry with 1ml of Refined Glycerin USP 99.5% and 1 ml of Green Tea Powder.
    stephenson personal care OMP soap craftiviti DIY melt and pour soap 2
  3. Turn off heat once the soap base has completely melted. Add up to 1ml of 100% Calendula Oil, 10 drops of Chamomile Essential Oil and the Green Tea+Glycerin Slurry from Step 2 into the melted soap base. Stir well.
  4. Pour the mixture into a silicone mold.
    *Note: You can use Isopropyl Alcohol in a spray bottle to pop surface bubbles in the melted soap base.
    stephenson personal care OMP soap craftiviti DIY melt and pour soap 4
  5. Set aside for 4-6 hours so that it can fully harden. You can use the soap immediately after!
stephenson personal care OMP soap craftiviti DIY melt and pour soap 3

happy crafting
Pssst, we're also available at Craftiviti.com!

Wednesday, August 21, 2019

Epoxy Resin and Resin Art


If you’ve seen gorgeous and nearly realistic art of the ocean going around social media, it’s most likely done using epoxy resin. But, what is epoxy resin? How do we create art with it?

What is epoxy resin?

Epoxy resin is a brilliant medium that’s lustrous like glass but with a composition like plastic. It pairs form with functionality, resulting in endless artistic possibilities like fairy pendants, seascape art, pseudo-marble vanities, and wood river tables. It’s experimental nature and ethereal aesthetic allows for gorgeous results. Best of all, it’s non-toxic, odorless and does not give off poisonous fumes like polyester resin.
craftiviti epoxy resin fluid art abstract on canvas

How do we create art with it?

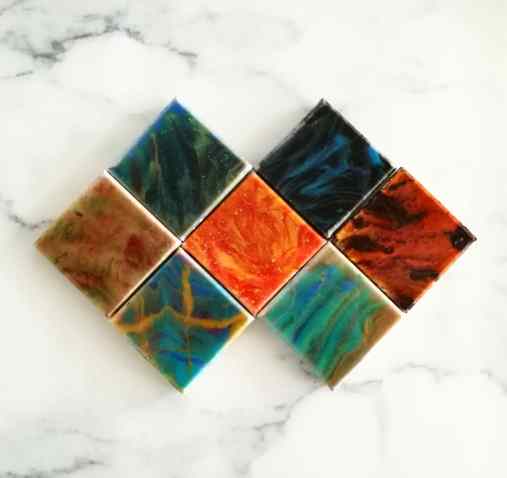
There are many ways in which art can be created from epoxy resin. You can make statues with it through the usage of silicone moulds; encase plants, sand, stones, toys and more inside resin; or simply create fluid art by colouring the resin and pouring it over any surface like a table top or a canvas.
craftiviti epoxy resin clearEpoxy resin comes in two parts: resin and hardener. They are normally mixed together according to a 1:1, 2:1 or 3:1 ratio. The bottle label will indicate the mixing ratio. When mixed correctly according to ratio, the resin and hardener will react with each other and gradually harden into a hard glossy plastic. An inaccurate measurement of either part will result in a piece that won’t harden properly.
*The Clear Epoxy Resin we sell at our store has a 2:1 ratio. We also have other types of epoxy resin that you can find at our store!

Safety always comes first!

Take care while handling epoxy resin! It’s important to work in a well-ventilated area, to wear latex gloves, and to protect the surface of your work space with silicone mats or plastic sheets. Epoxy resin is difficult to get rid of when it comes in contact with other surfaces! Also, if you’ve accidentally gotten epoxy resin on your skin, immediately rub Vaseline onto the area and wash it.

Want to know more?

Check out this comprehensive post by acrylgiessen.com on the Basics for your first Steps in Resin Art 😍


Thank you for reading! We hope this helps ❤
happy crafting
Pssst, we're also available at Craftiviti.com!

JOIN US ON FACEBOOK