Tuesday, January 29, 2019

DIY 3 Ingredients Facial Toner


Looking for the right facial toner for your skin isn’t as easy as it seems to be, especially when there’s an ocean of facial toners out there to try. We have to be certain that the ingredients in commercial facial toners are both compatible and kind to our skin (alcohol, parabens, and other harmful chemicals like salicylic acid are no-no’s!), and that there are benefits to reap (why spend on something that has no outcome, after all?).
Today, we offer an alternative to commercial facial toners that may be more cost-effective and better for your skin. Using only three key ingredients, you will end up with an amazing rose-scented toner that’s luxurious and incredibly beneficial for your skin!

Ingredients and their Benefits
– helps maintain the skin’s pH balance
– aids in controlling excess oil, and removing oil and dirt accumulated in clogged pores
– has anti-inflammatory, antibacterial and antioxidant properties
– helps hydrate, revitalise and moisturise the skin

– relieves inflammation and reduces skin irritation
– nourishes and moisturises skin
– can help tighten pores and reduce puffiness
– assists in speeding up the healing process of skin

3. Refined Glycerin USP 99.5% (click here to buy from our store!)
– moisturises, nourishes and smooths skin
– maintains water balance in skin
– assist in the healing process of skin while also protecting it
– also makes skin soft and supple

Recipe
*Please keep in mind that these are only suggested amounts for each recipe. It can differ for each person as everyone has their own personal preferences, and not all skin types are 100% the same as well.
Dry and/or Sensitive Skin
Rose water is perfect for dry and/or sensitive skin. So, there should be more rose water than witch hazel in this toner.
Our suggested amount:
  • 75% rose water of total amount of toner
  • 25% witch hazel of total amount of toner
  • ¼ teaspoon of Refined Glycerin USP 99.5% for each 225g of toner
Normal or Combination Skin
Our suggested amount:
  • 50% rose water of total amount of toner
  • 50% witch hazel of total amount of toner
  • ¼ teaspoon of Refined Glycerin USP 99.5% for each 225g of toner
Oily Skin
Witch hazel is perfect oily skins as it has astringent properties which makes it more drying compared to rose water. So, there should be more witch hazel than rose water in this toner.
Our suggested amount:
  • 25% rose water of total amount of toner
  • 75% witch hazel of total amount of toner
  • 1/8 teaspoon of Refined Glycerin USP 99.5% for each 225g of toner

Instructions
  1. Add witch hazel into desired container.
  2. Measure out the glycerine and add it in.
  3. Add rose water last.
  4. Cover tightly and shake to combine the mixture.
  5. Your toner is ready to use!

Email us if you have any enquiries at enquiry@craftiviti.com or pop by Craftiviti Craft Store at 10 Boulevard, Petaling Jaya, Malaysia.
If you found this post useful, please join us on Craftiviti Facebook or Instagram for more updates and demos!

References:
  1. “10 Rose Water Benefits: From Antioxidants To Anti-Aging”, NDTV Food, 2018 <https://food.ndtv.com/beauty/10-benefits-of-rose-water-you-need-to-know-1239785> [Accessed 30 January 2019].
  2. “18 Awesome Uses For Witch Hazel On Face, Skin | 8 DIY Recipes”, My Awesome Beauty<https://myawesomebeauty.com/witch-hazel-uses/> [Accessed 30 January 2019].
  3. “The Benefits Of Glycerin In Skincare | Paula’s Choice”, Paula’s Choice Skincare<https://www.paulaschoice.com/expert-advice/skincare-advice/best-products/benefits-glycerin-skincare.html> [Accessed 30 January 2019].
Pssstwe're also available at Craftiviti.com!

Tuesday, January 22, 2019


Essential oil blends have their own unique synergy. They provide a combined effect that is greater than their separate effects. Of course, it is easier to buy ready-made essential oil blends but those blends not meet your exact preferences. Therefore, for this post, we are going to share the basics of how you can make your own essential oil blend.
Who, What, When, Why, Where?
Before you make your own essential oil blend, it is important for you to be able to answer these questions:
  1. Who will be using it? (You? Your family? Your friend?)
  2. What effects must it have? (Just for the smell? Or the emotional/physical benefits?)
  3. When will it be used? (During the day while you get ready for work/school? Or during the night when you’re about to sleep?)
  4. Why is it needed? (To help you energize yourself? To calm you down?)
  5. Where will it be used? (In a diffuser? In your soaps? Skincare products?)
These questions are a guide for you to follow during your journey of blending essential oils as each essential oil has its own unique smell and varying benefits and properties. Moreover, some essential oils are organic, some may be too expensive to be used in frequent and large quantities. Know your answers to the questions above and it can help you throughout this craft.
*Be careful about where you get your information about essential oils online! Always cross check with other sources and make sure that the source is reliable as well.

Choose Quality Essential Oils
When purchasing essential oils, do ensure that they are 100% pure so that you won’t have to use too much just so you can get the right intensity of smell. Also ensure that you’re purchasing from established brands, so you won’t be led astray!

Categories and Notes
You should also pick your essential oils based on categories and notes.
Categories
Essential oils tend to blend well together if they are from the same category.  Based on the essential oils we carry in our store, here are some according to their category, though do note that some of them overlap:
Citrus – Grapefruit, Sweet Orange, Lemon
Earthy – Clary Sage, Carrot Seed, Ginger Root
Floral – Lavender, Geranium, Tuberose, Ylang Ylang, Clary Sage, Palma Rosa
Herby – Clary Sage, Sweet Basil, Frankincense, Lemongrass, Eucalyptus, Rosemary, Tea Tree, Cajeput
Minty – Peppermint, Spearmint
Spicy – Clove Bud, Star Anise, Ginger Root
Woodsy – Cedarwood, Clove Bud
Camphoraceous – Eucalyptus, Frankincense, Rosemary
Musky – Patchouli, Citronella
Notes
The notes of an essential oil determine how quickly the essential oil evaporates. They are graded based on top notes, middle notes and base notes.
Top notes – First impression, the fastest to evaporate. Usually derived from flowers, leaves, and flowering herbs.
Middle notes – The heart of the blend, surfaces after the top notes evaporate. Usually derived from whole herbs and spices.
Base notes – The end, the final to surface. Usually derived from trees, roots, and barks.

Creating Blends
When starting a new blend, always begin with small batches so you can test your blend without wasting too much. As a general rule, you can follow the suggested quantities below for your blends:
Top – 20 to 40% of total volume of blend.
Middle – 40 to 80% of total volume of blend.
Base – 10 to 25% of total volume of blend.

Let It Rest and Test
Once you’re done blending the essential oils, let the result rest for 24-48 hours. This is so that the chemicals and constituents of the oils can meld and mix together, resulting in a more seamless blend.
Afterwards, do test your blend to see if the aroma of it is favourable or not.
*To give your blends (and essential oils) a longer shelf life, check out this blog post of ours!

Email us if you have any enquiries at enquiry@craftiviti.com or pop by Craftiviti Craft Store at 10 Boulevard, Petaling Jaya, Malaysia.

If you found this post useful, please join us on Craftiviti Facebook or Instagram for more updates and demos!

Pssstwe're also available at Craftiviti.com!

Wednesday, January 16, 2019

2 Ways to Make Your Own Reusable Beeswax Wrap

When used to store or heat food, plastic leaches toxins into the food which is later consumed by us. There are many studies that have proven that BPA (a common chemical in many plastics) causes a variety of health issues for those who consume food products that have come in contact with it. (1) They’re terrible to our health and terrible to the environment as well.
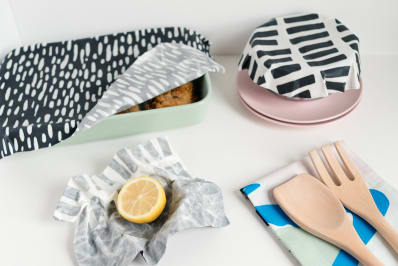
Therefore, beeswax wraps are a safe and effective alternative to plastic wraps and plastic containers (though, they do come with limitations. For instance, the inability to contain liquids). They are beautiful, functional, reusable, economical and eco-friendly. They are multipurpose and best of all, they’re incredibly easy to make too!
*If you’d like to know all about beeswax wraps, do check out this super informative post by Cerawrap!
For this post, we will be sharing two different ways you can make your own beeswax wrap:
1. Using Beeswax Only
In this tutorial by Apartment Therapy, you’ll be able to make your own reusable beeswax wraps with only beeswax as the main ingredient.
Materials and Tools Needed:
– Beeswax (you can use any of the beeswax we have in store)
– Fabric (cotton fabric would be great!)
– Parchment Paper
– Baking Sheet
– Scissors (optional)
– Brush

2. Using Beeswax, Pine Rosin and Jojoba Oil
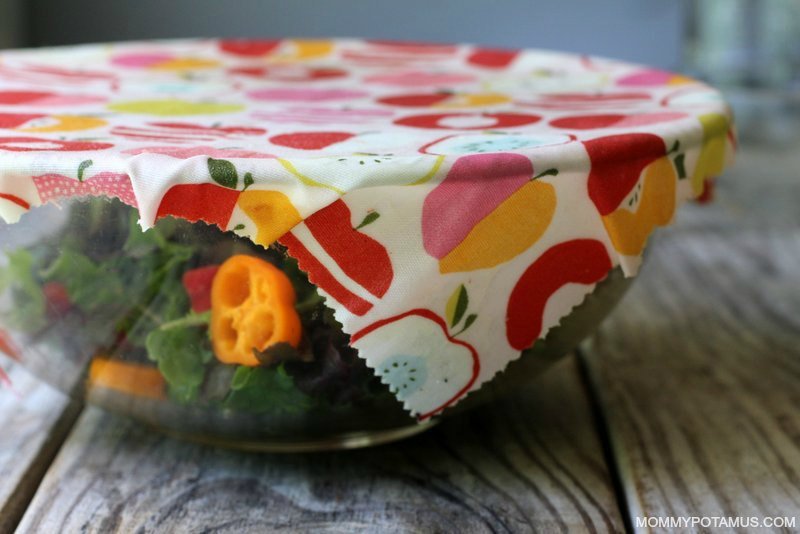
Homemade Reusable Food Wrap
On the other hand, mommypotamus uses beeswax, pine rosin and jojoba oil in her tutorial. The pine rosin gives the wrap it’s cling factor, while the jojoba oil adds a little more tackiness to it. Together, they help to create a seal on a bowl, or to keep the wrap folded tightly around a food product.
Materials and Tools Needed:
– Beeswax (you can use any of the beeswax we have in store)
– Pine Rosin (available here in our store)
– Jojoba Oil (also available in our store)
– Fabric (cotton fabric would be great!)
– Brush
– Baking Sheet
– Scissors (optional)

Email us if you have any enquiries at enquiry@craftiviti.com or pop by Craftiviti Craft Store at 10 Boulevard, Petaling Jaya, Malaysia.
If you found this post useful, please join us on Craftiviti Facebook or Instagram for more updates and demos!

References:
  1. Frederick S. vom Saal and others, “Chapel Hill Bisphenol A Expert Panel Consensus Statement: Integration Of Mechanisms, Effects In Animals And Potential To Impact Human Health At Current Levels Of Exposure”, Reproductive Toxicology, 24.2 (2007), 131-138 <https://doi.org/10.1016/j.reprotox.2007.07.005>.
  2. “DIY Reusable Food Wrap”, Mommypotamus<https://www.mommypotamus.com/diy-reusable-food-wrap/> [Accessed 16 January 2019].
  3. “How To Make Your Own Reusable Food Wrap”, Apartment Therapy, 2018 <https://www.apartmenttherapy.com/how-to-make-your-own-reusable-food-wrap-244307> [Accessed 16 January 2019].
  4. “The Ultimate Guide To Beeswax Wraps”, Cerawrap, 2018 <https://www.cerawrap.com/blog/2018/5/29/the-ultimate-guide-to-beeswax-wraps> [Accessed 16 January 2019].
Pssstwe're also available at Craftiviti.com!

Wednesday, January 9, 2019

DIY: Lavender Rose Salt Scrub


One of the best ways to maintain gorgeous skin is manual exfoliation. Therefore, there are various scrubbing products available on the market, ranging from coffee scrubs to herbal scrubs and moisturizing scrubs. Nevertheless, salt scrubs and sugar scrubs remain the most popular choices. It should be noted that there are differences between a salt scrub and a sugar scrub, though.

*If you’d like to know about the differences and benefits of a salt scrub VS a sugar scrub, check out:
1. The Pros and Cons Of Salt vs Sugar Scrubs by Organic Elements Spa
2. Benefits of Sugar Scrubs VS Salt Scrubs by Suburban Simplicity

For this post, we will be sharing a simple DIY on how to make your own lavender rose salt scrub that can immediately be used for one time, and is free from additional ingredients like parabens and parfum. This scrub is meant to be used on the body since salt particles are more abrasive on the face. If you have sensitive skin or would like to make a face scrub instead, you can switch out the salt for sugar (such as our Natural Raw Sugar).
If you’d like, you can purchase these ingredients from our store:
  1. Pink Scrubbing Salt (you can mix some Epsom salt in as well, but using only Epsom salt might not give you all the benefits a salt scrub normally has. *If you’d like to know why, do check out this post by Tavoos!)
  2. Refined Coconut Oil (you can switch this with other carrier oils)
  3. Lavender Essential Oil
  4. Dried Rose Buds
Other Tools Needed:
  1. Measuring cup
  2. Spoon
  3. Container to put the finished product in (you can check out the types of packaging we sell here)
Instructions
1. Measure out 100 grams of pink scrubbing salt and add it to your container of choice. If your container is already meant to contain 100 grams, you can pour it directly into the container.
2. Depending on the kind of texture you prefer, add in 40-50 grams of coconut oil into the salt. Should it be too dry for your preference, you can add more coconut oil.
3. Add up to 4 drops (maximum per 100g, if you’re using Craftiviti’s essential oil) of lavender essential oil to the product.
4. Take the dried rose buds and pinch off the top (don’t break it off too close to the stem) before crushing and adding them to the product.
5. Mix the ingredients together and voila! Your lavender rose salt scrub is not ready to be used!
Notes:
*The lifespan of your scrub depends on the carrier oil you use.
*The dried rose buds (or any other dried flowers used) will change colour over time.
*The essential oil(s) used may eventually lose the potency of their scent and benefits due to oxidization.

Email us if you have any enquiries at enquiry@craftiviti.com or pop by Craftiviti Craft Store at 10 Boulevard, Petaling Jaya, Malaysia.
If you found this post useful, please join us on Craftiviti Facebook or Instagram for more updates and demos!
Pssstwe're also available at Craftiviti.com!

JOIN US ON FACEBOOK